How to Enable Auto-Disbursement Settings
Set Up Wonder Business AccountWonder Mobile App 2 min read Created May 24, 2024 Updated September 30, 2026
How to Link an External Bank Account
- Go to the Settings in your store
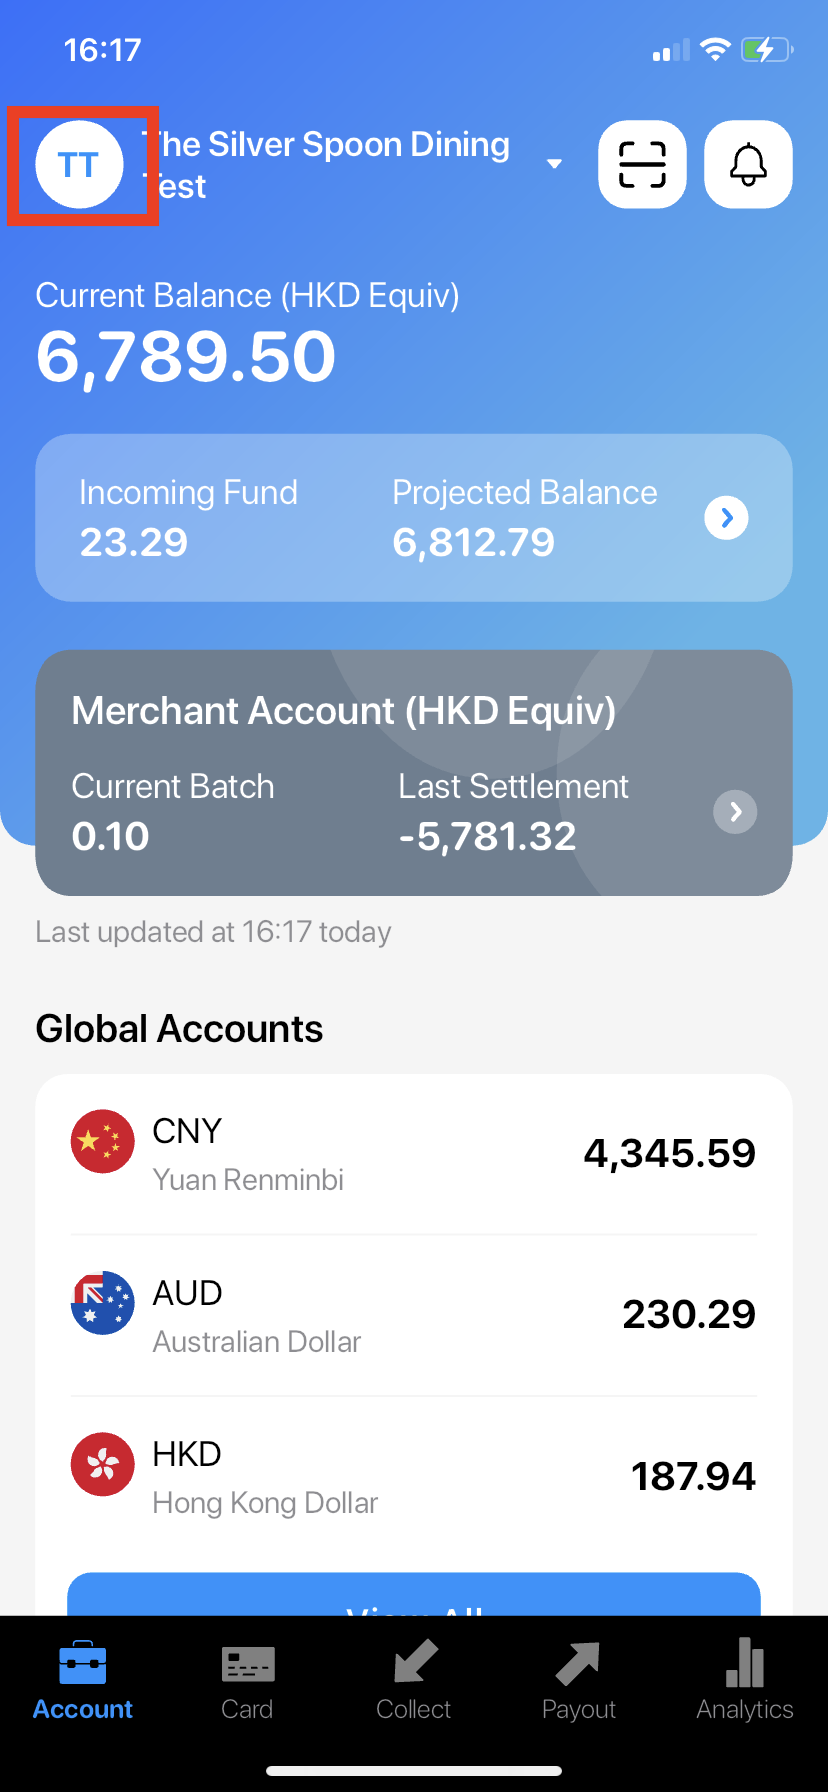
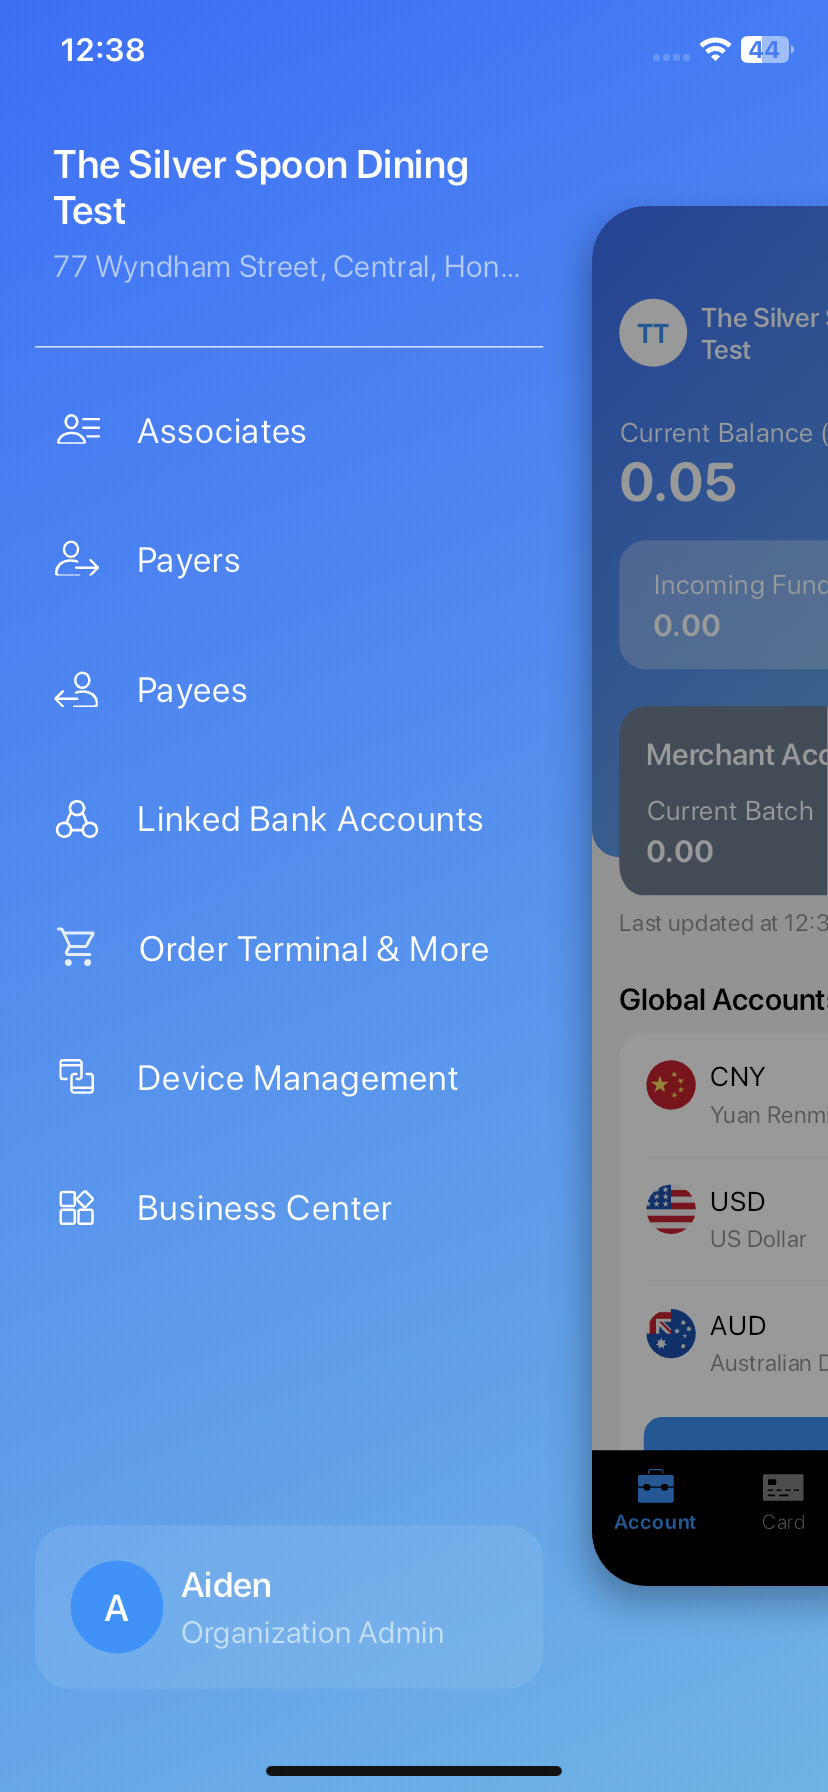
- Go to Linked Bank Accounts
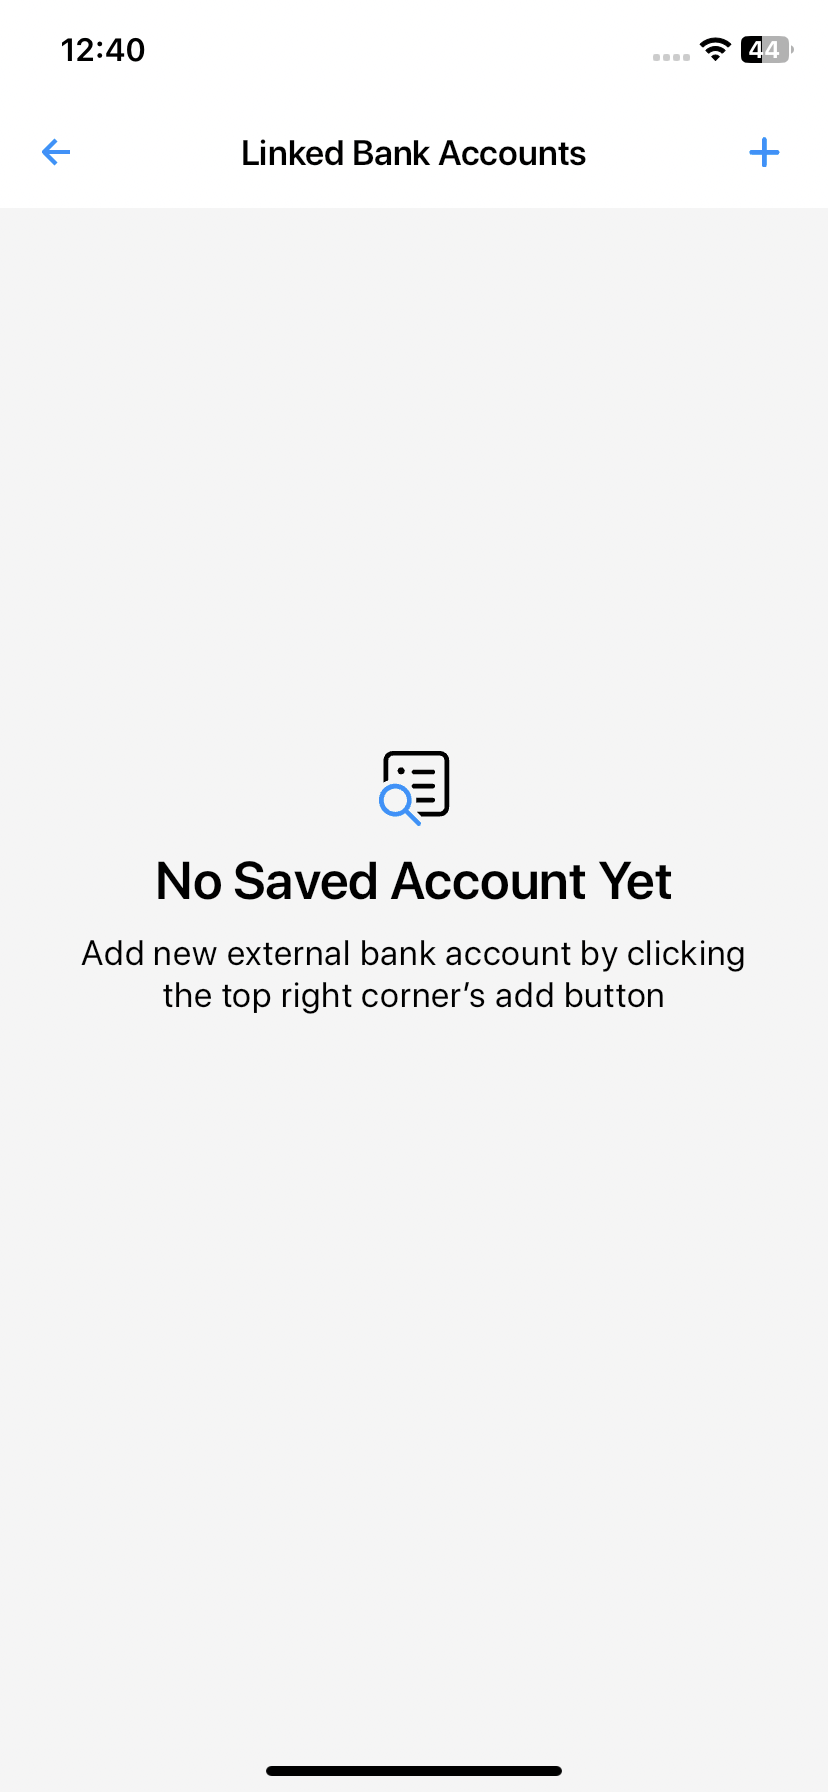
- Click the add icon on the top right corner
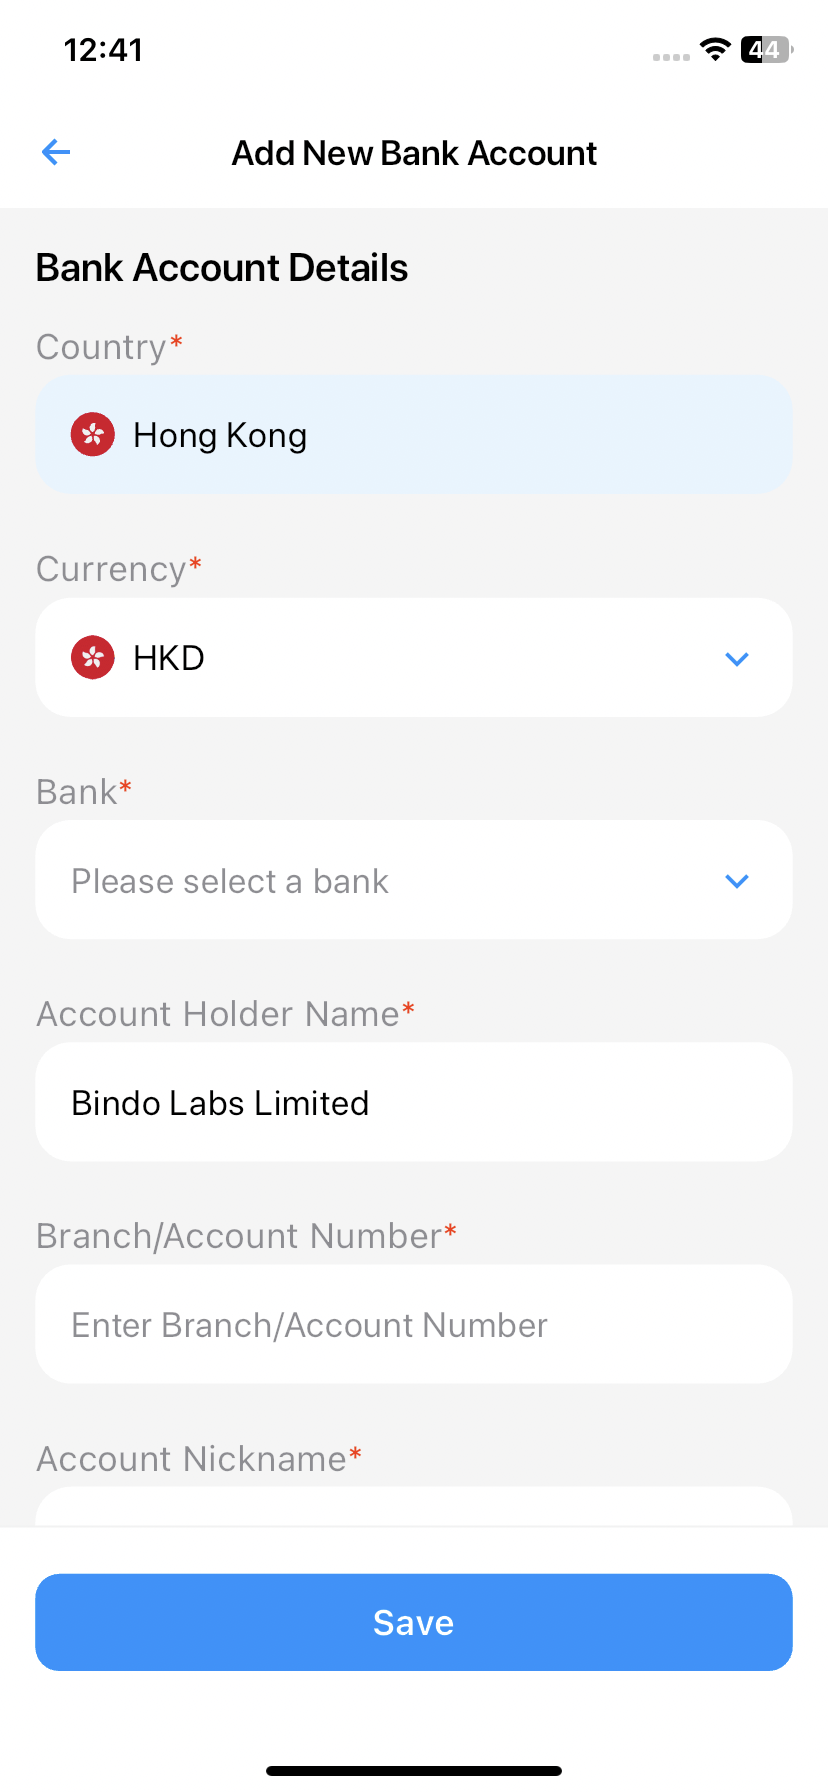
- Submit your bank account with the requested information, then "Save". Please note that once the account is verified, you are not able to edit the information. The account holder name would need to be the same as your business legal name
- You can edit or further submit information of your bank account if it cannot be verified automatically. To edit, from "Linked Bank Accounts" page, select the account to be verified, and "View Record".
- Click "Edit Bank Account"
- You could choose to upload bank statements from your device's photo album or storage, to support the account information, press "Save" after the documents are uploaded
- For more assistance, you could contact us at support@wonder.app
Enable Auto-disbursement
- Go to the Settings in your store
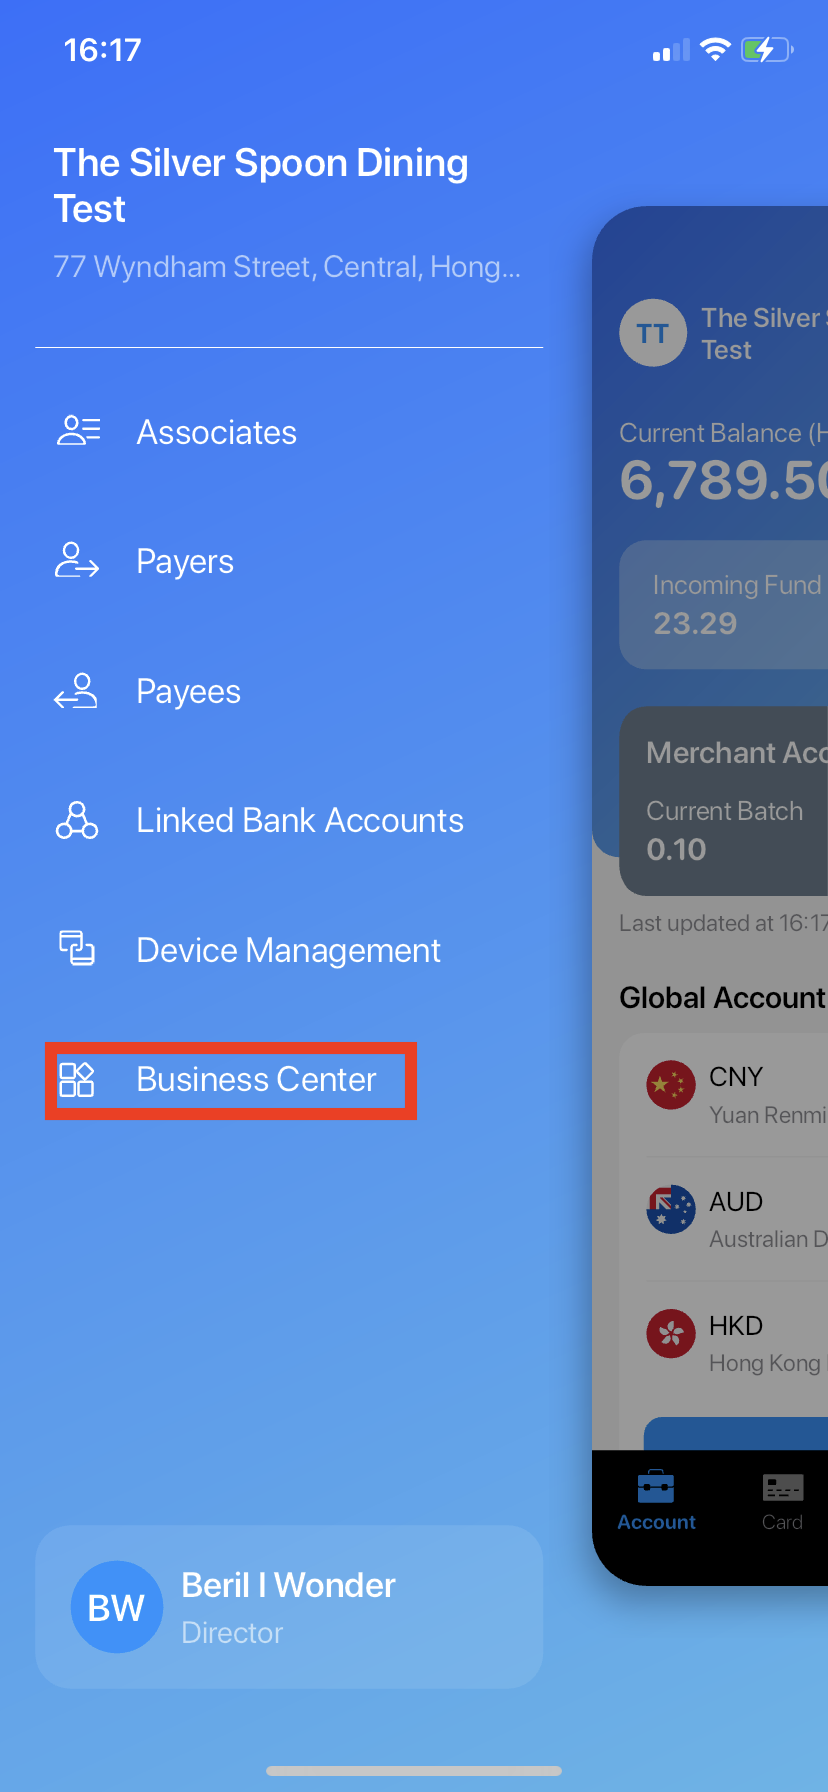
- Go to Business Center
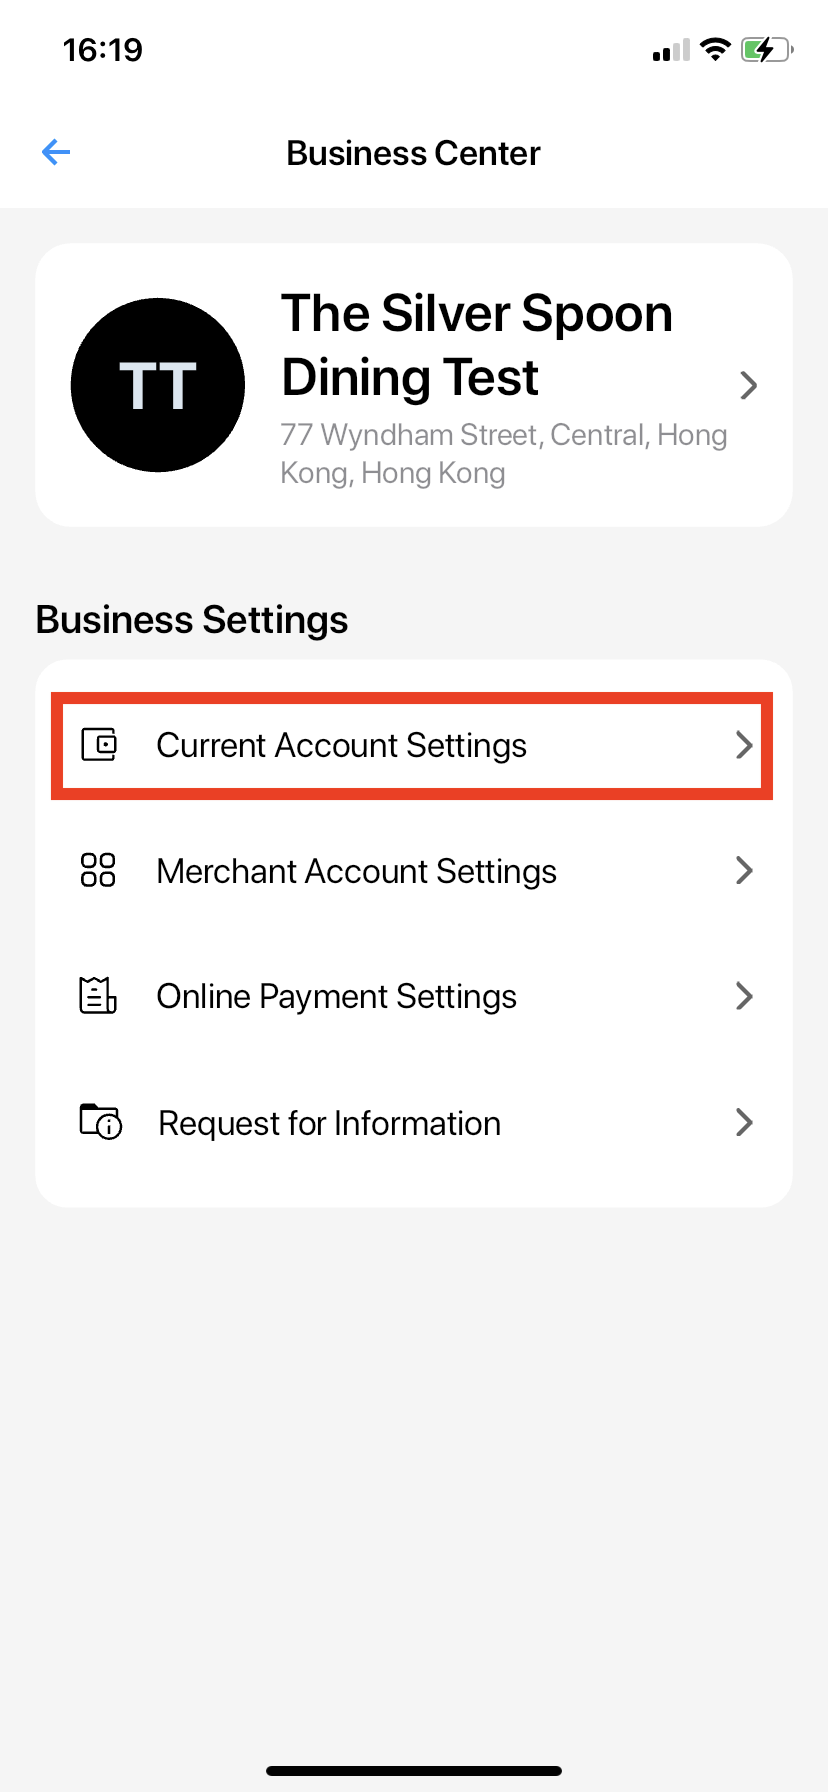
- Go to Current Account Settings
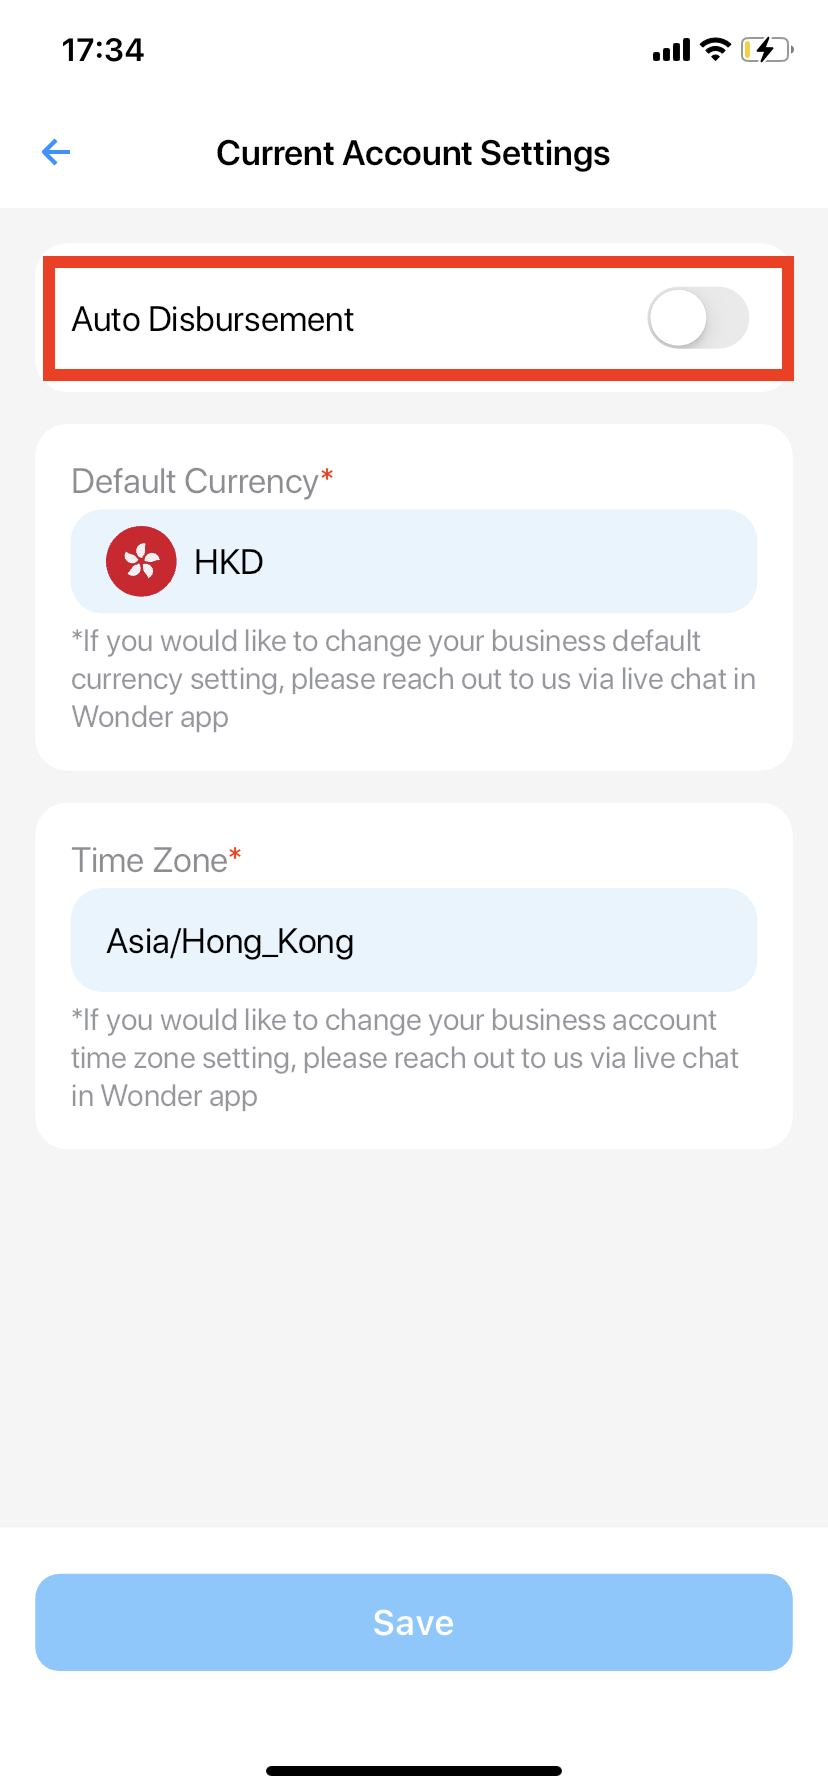
- Enable Auto Disbursement
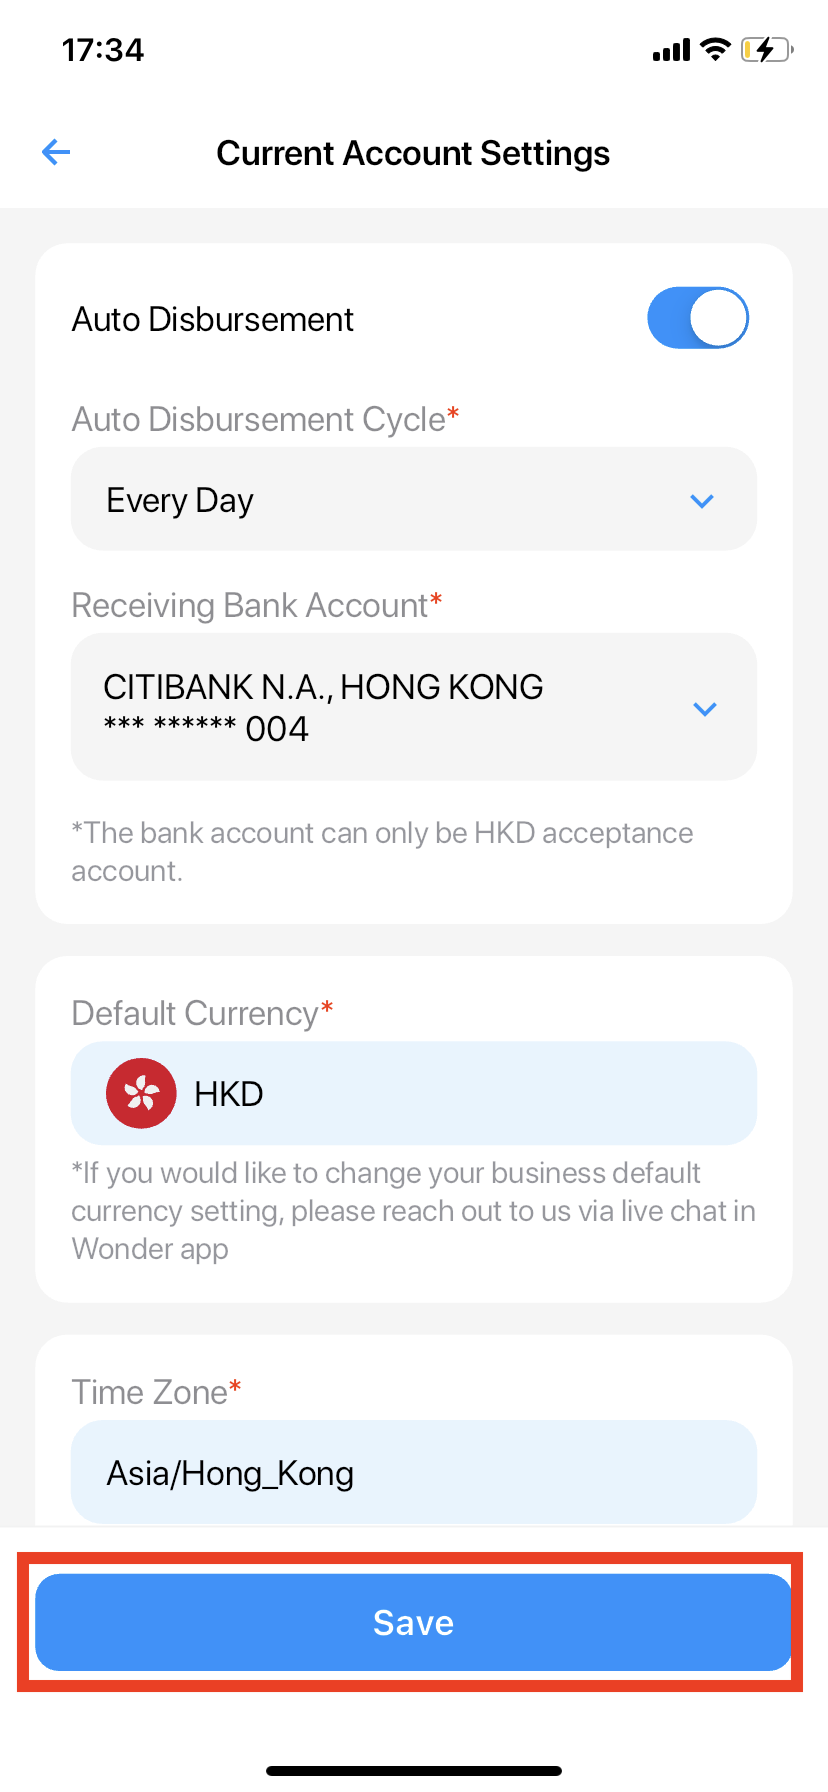
- If you have multiple Bank Accounts, you can select which one would you like to receive the auto-disbursement and Save the changes. Please note that only Approved and Verified Bank Accounts record can be used for this settings.
Did this answer your question?
If you still need help, our merchant support team is one message away.
Chat on WhatsApp