
Coming soon

Merchant Initiated Transactions Module on Wonder Dashboard allows you to perform Void, Refund and Pre-authorization Capture transactions in batch or manually from your merchant accounts. To enable this function or to know more, please contact support@wonder.app.
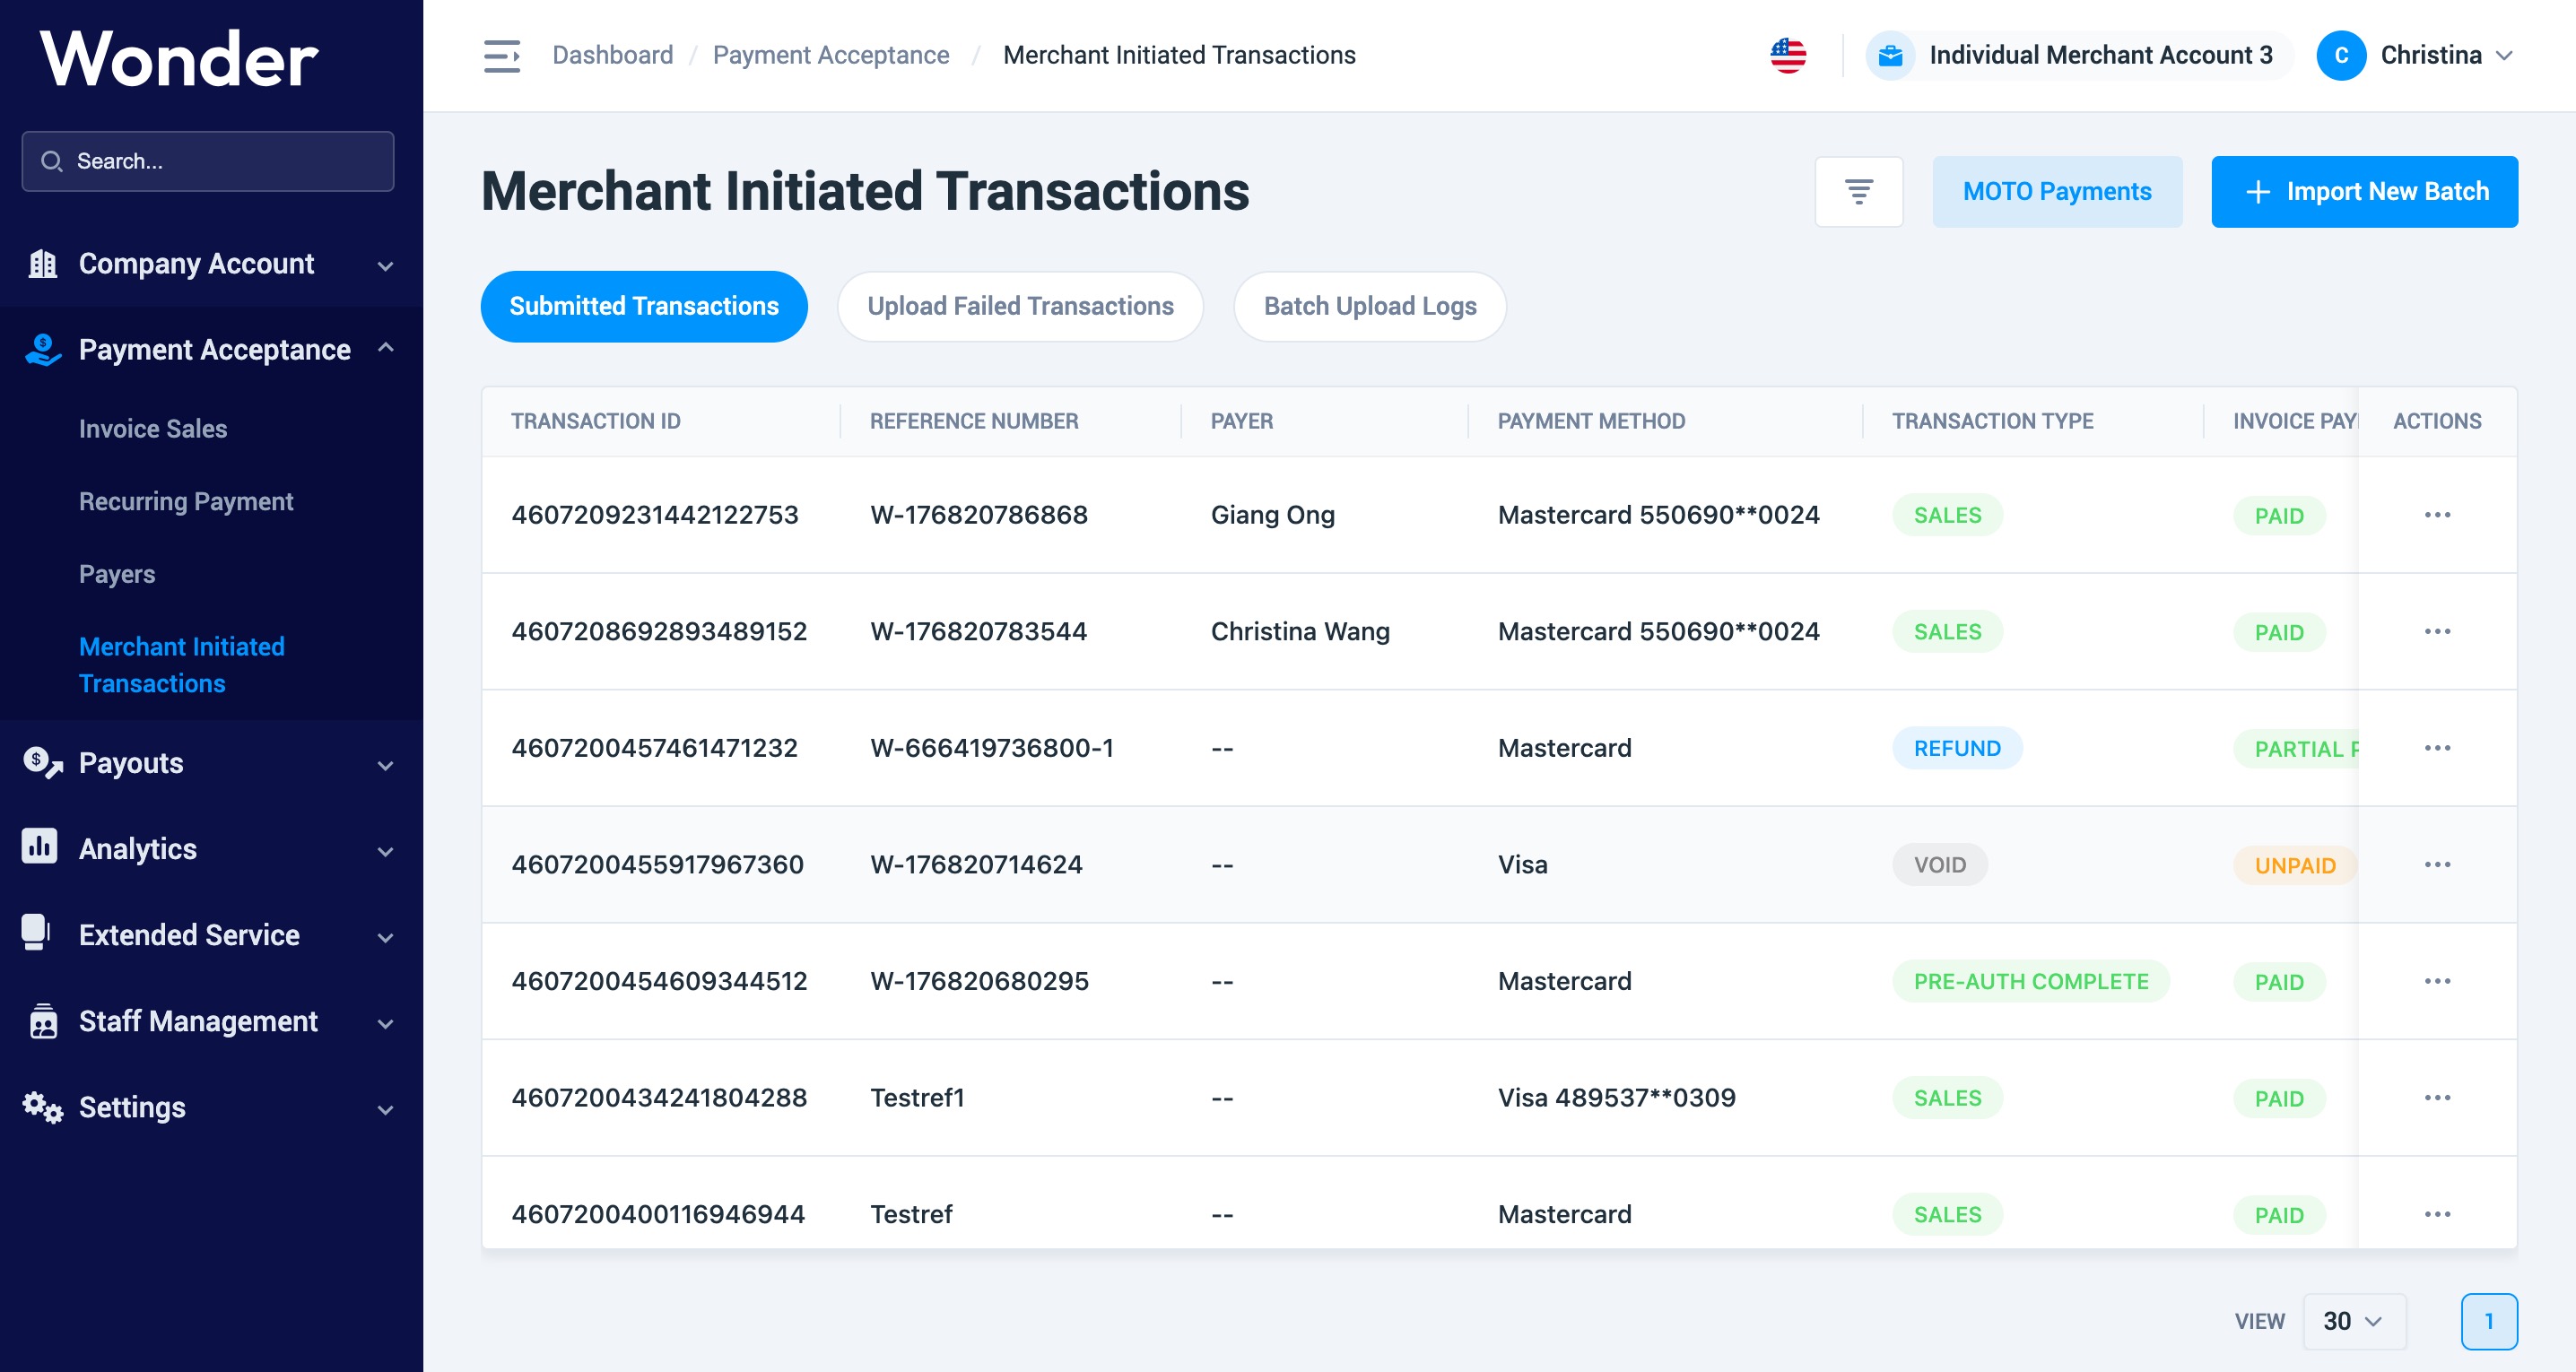
1- Go to your Store in Wonder Dashboard and select "Merchant Initiated Transactions" under "Payment Acceptance"
2- Select "Import New Batch"
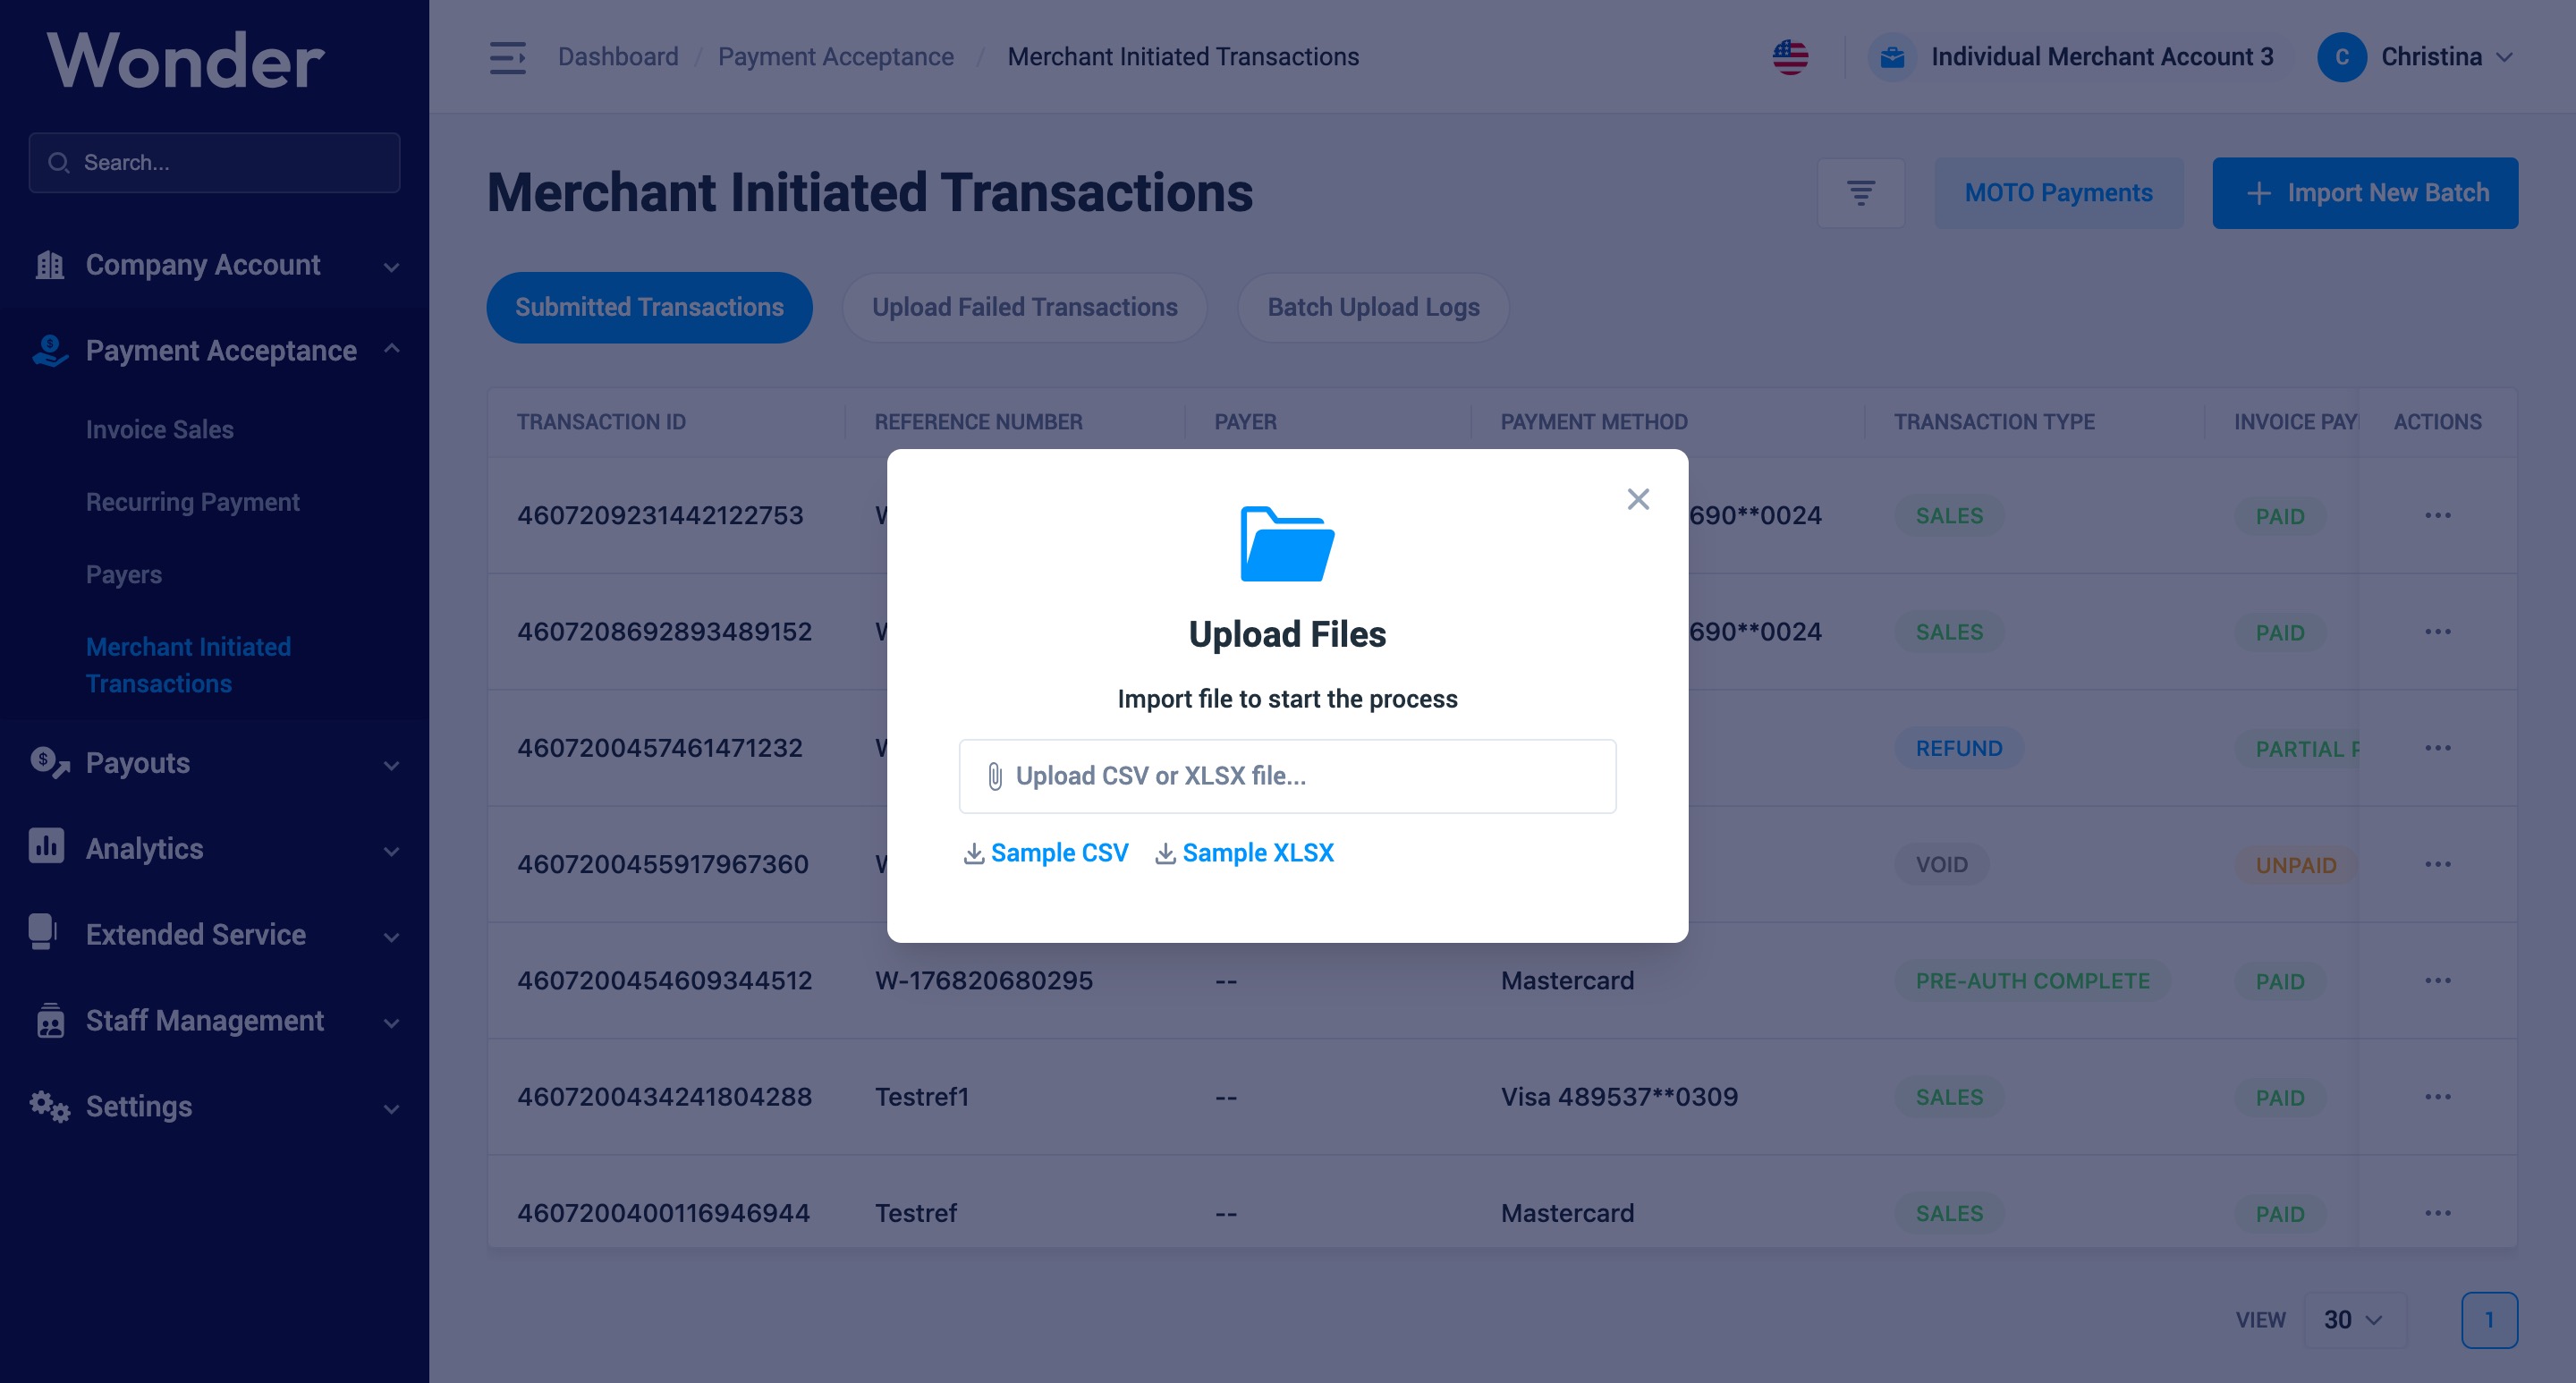
3- To use provided templates, choose to download "Sample CSV" or "Sample XLSX"
4- Edit the template file with editing software according to your transaction data and requirements, then click "Save"
5- From Wonder Dashboard, choose "Upload CSV or XLSX file", and select your saved edit record.
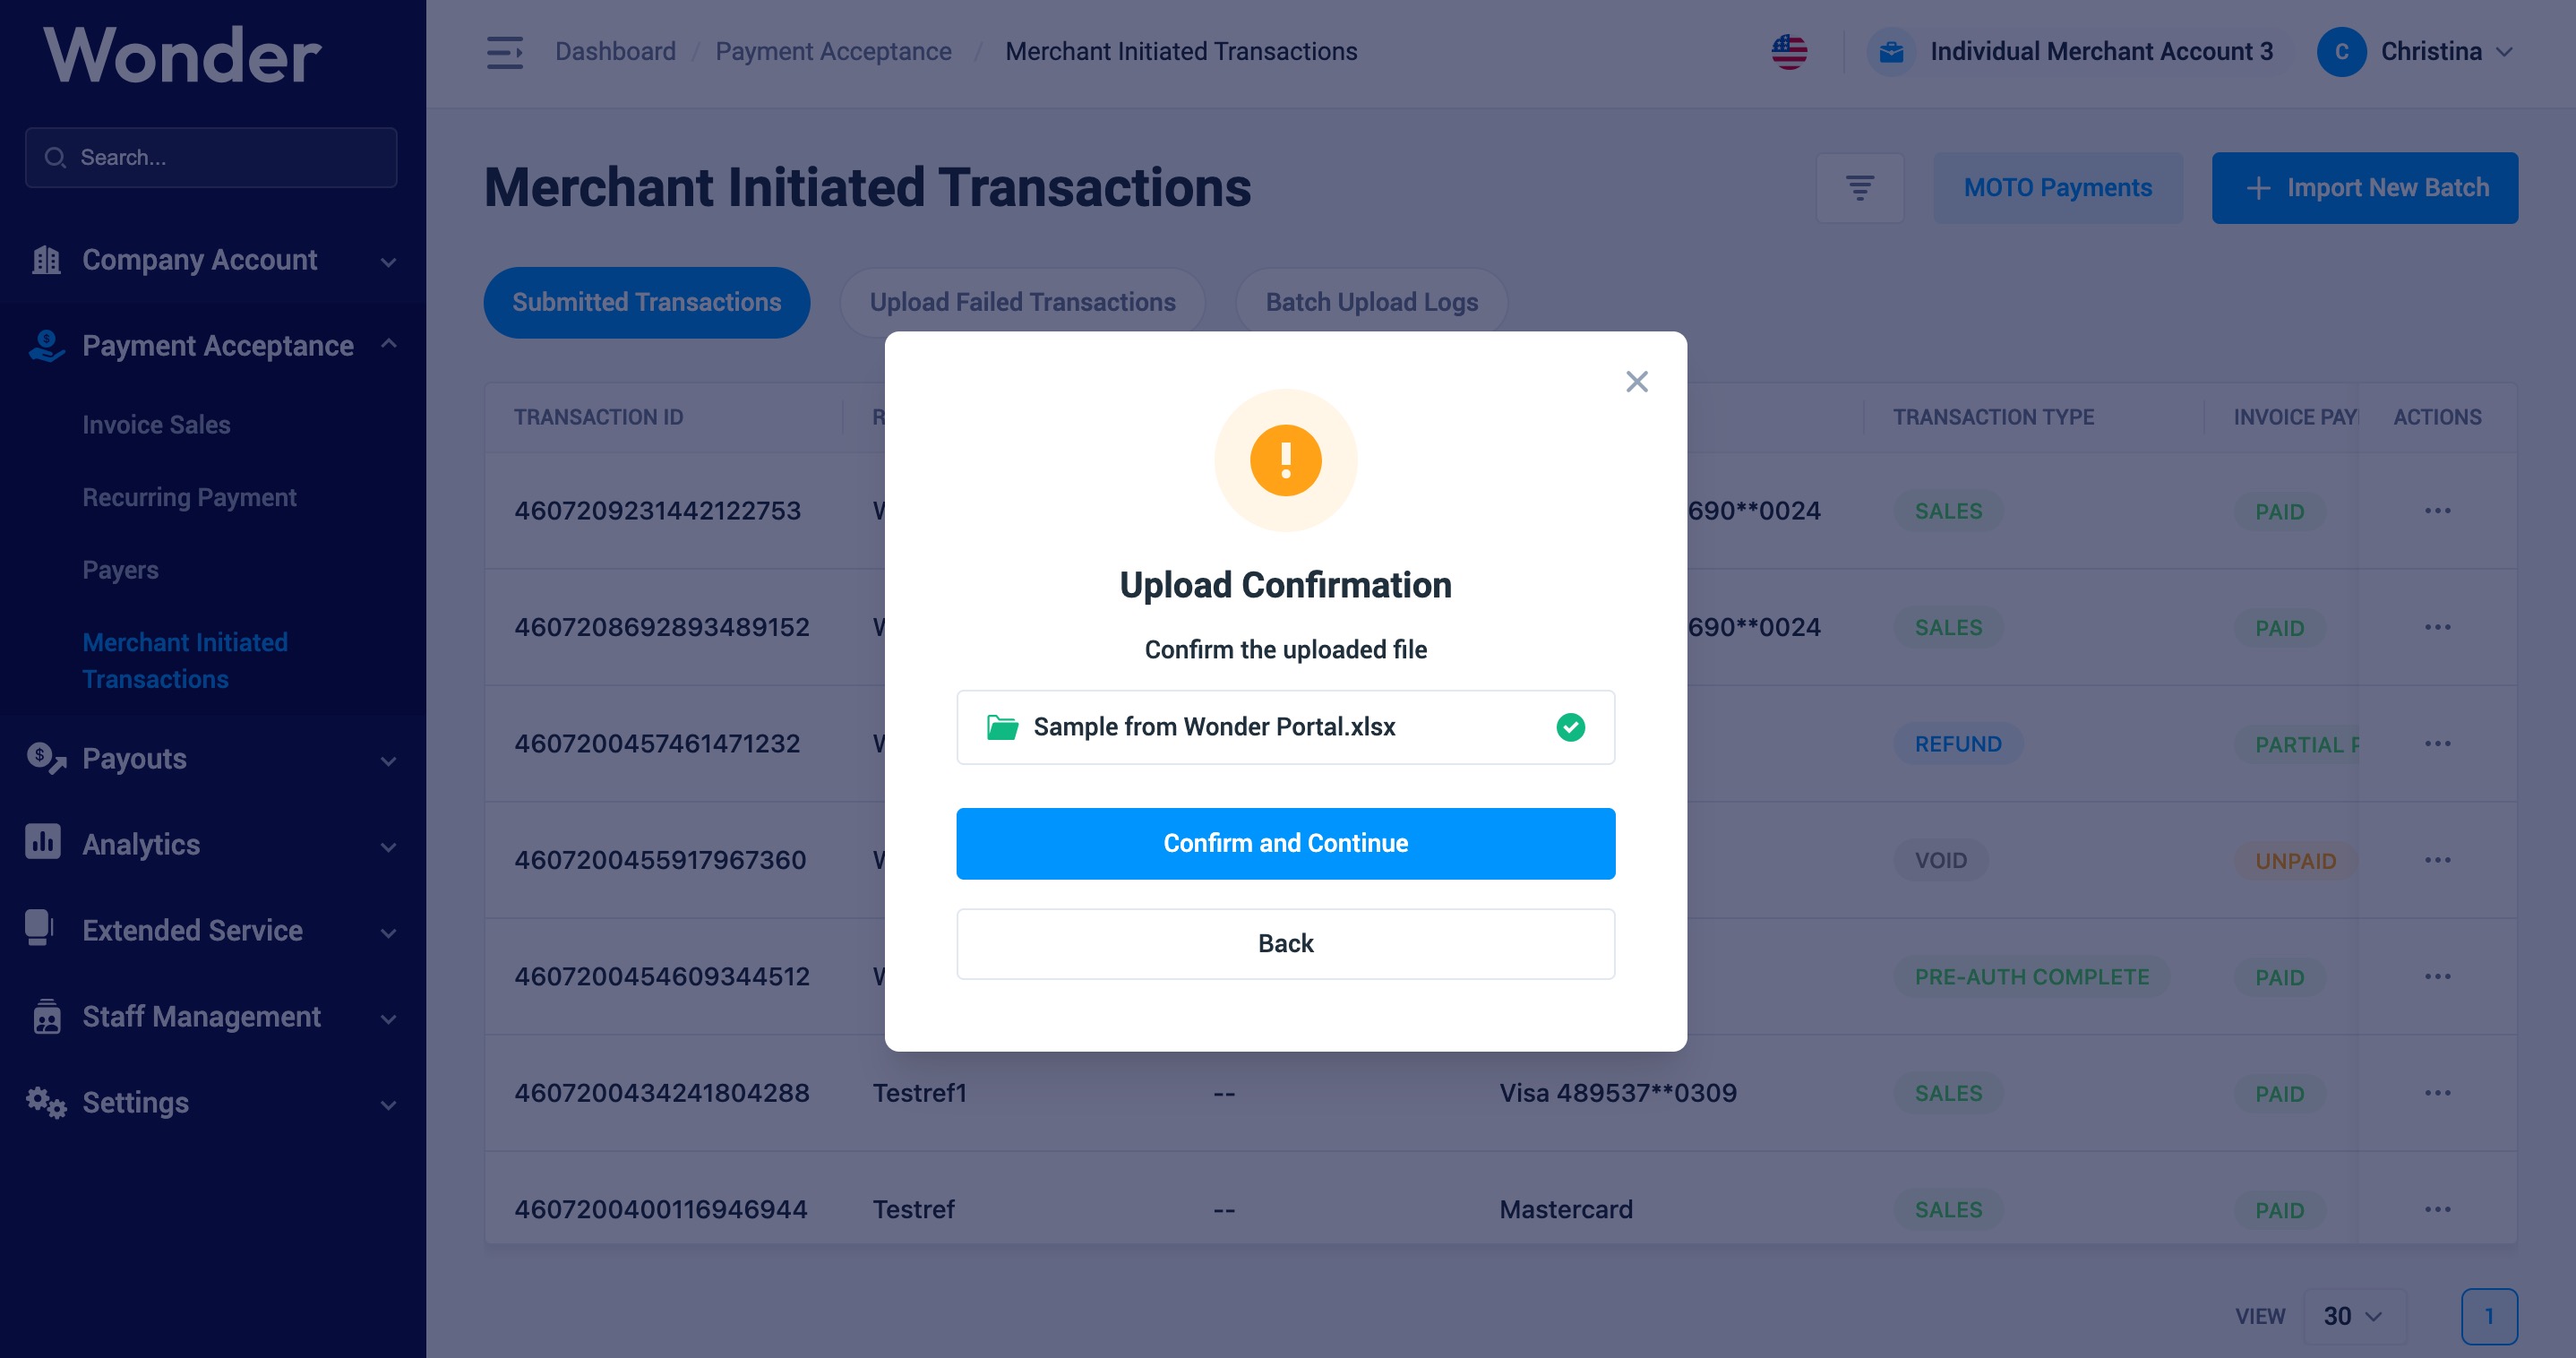
6- Choose "Confirm and Continue", the transactional request would be then irreversable.
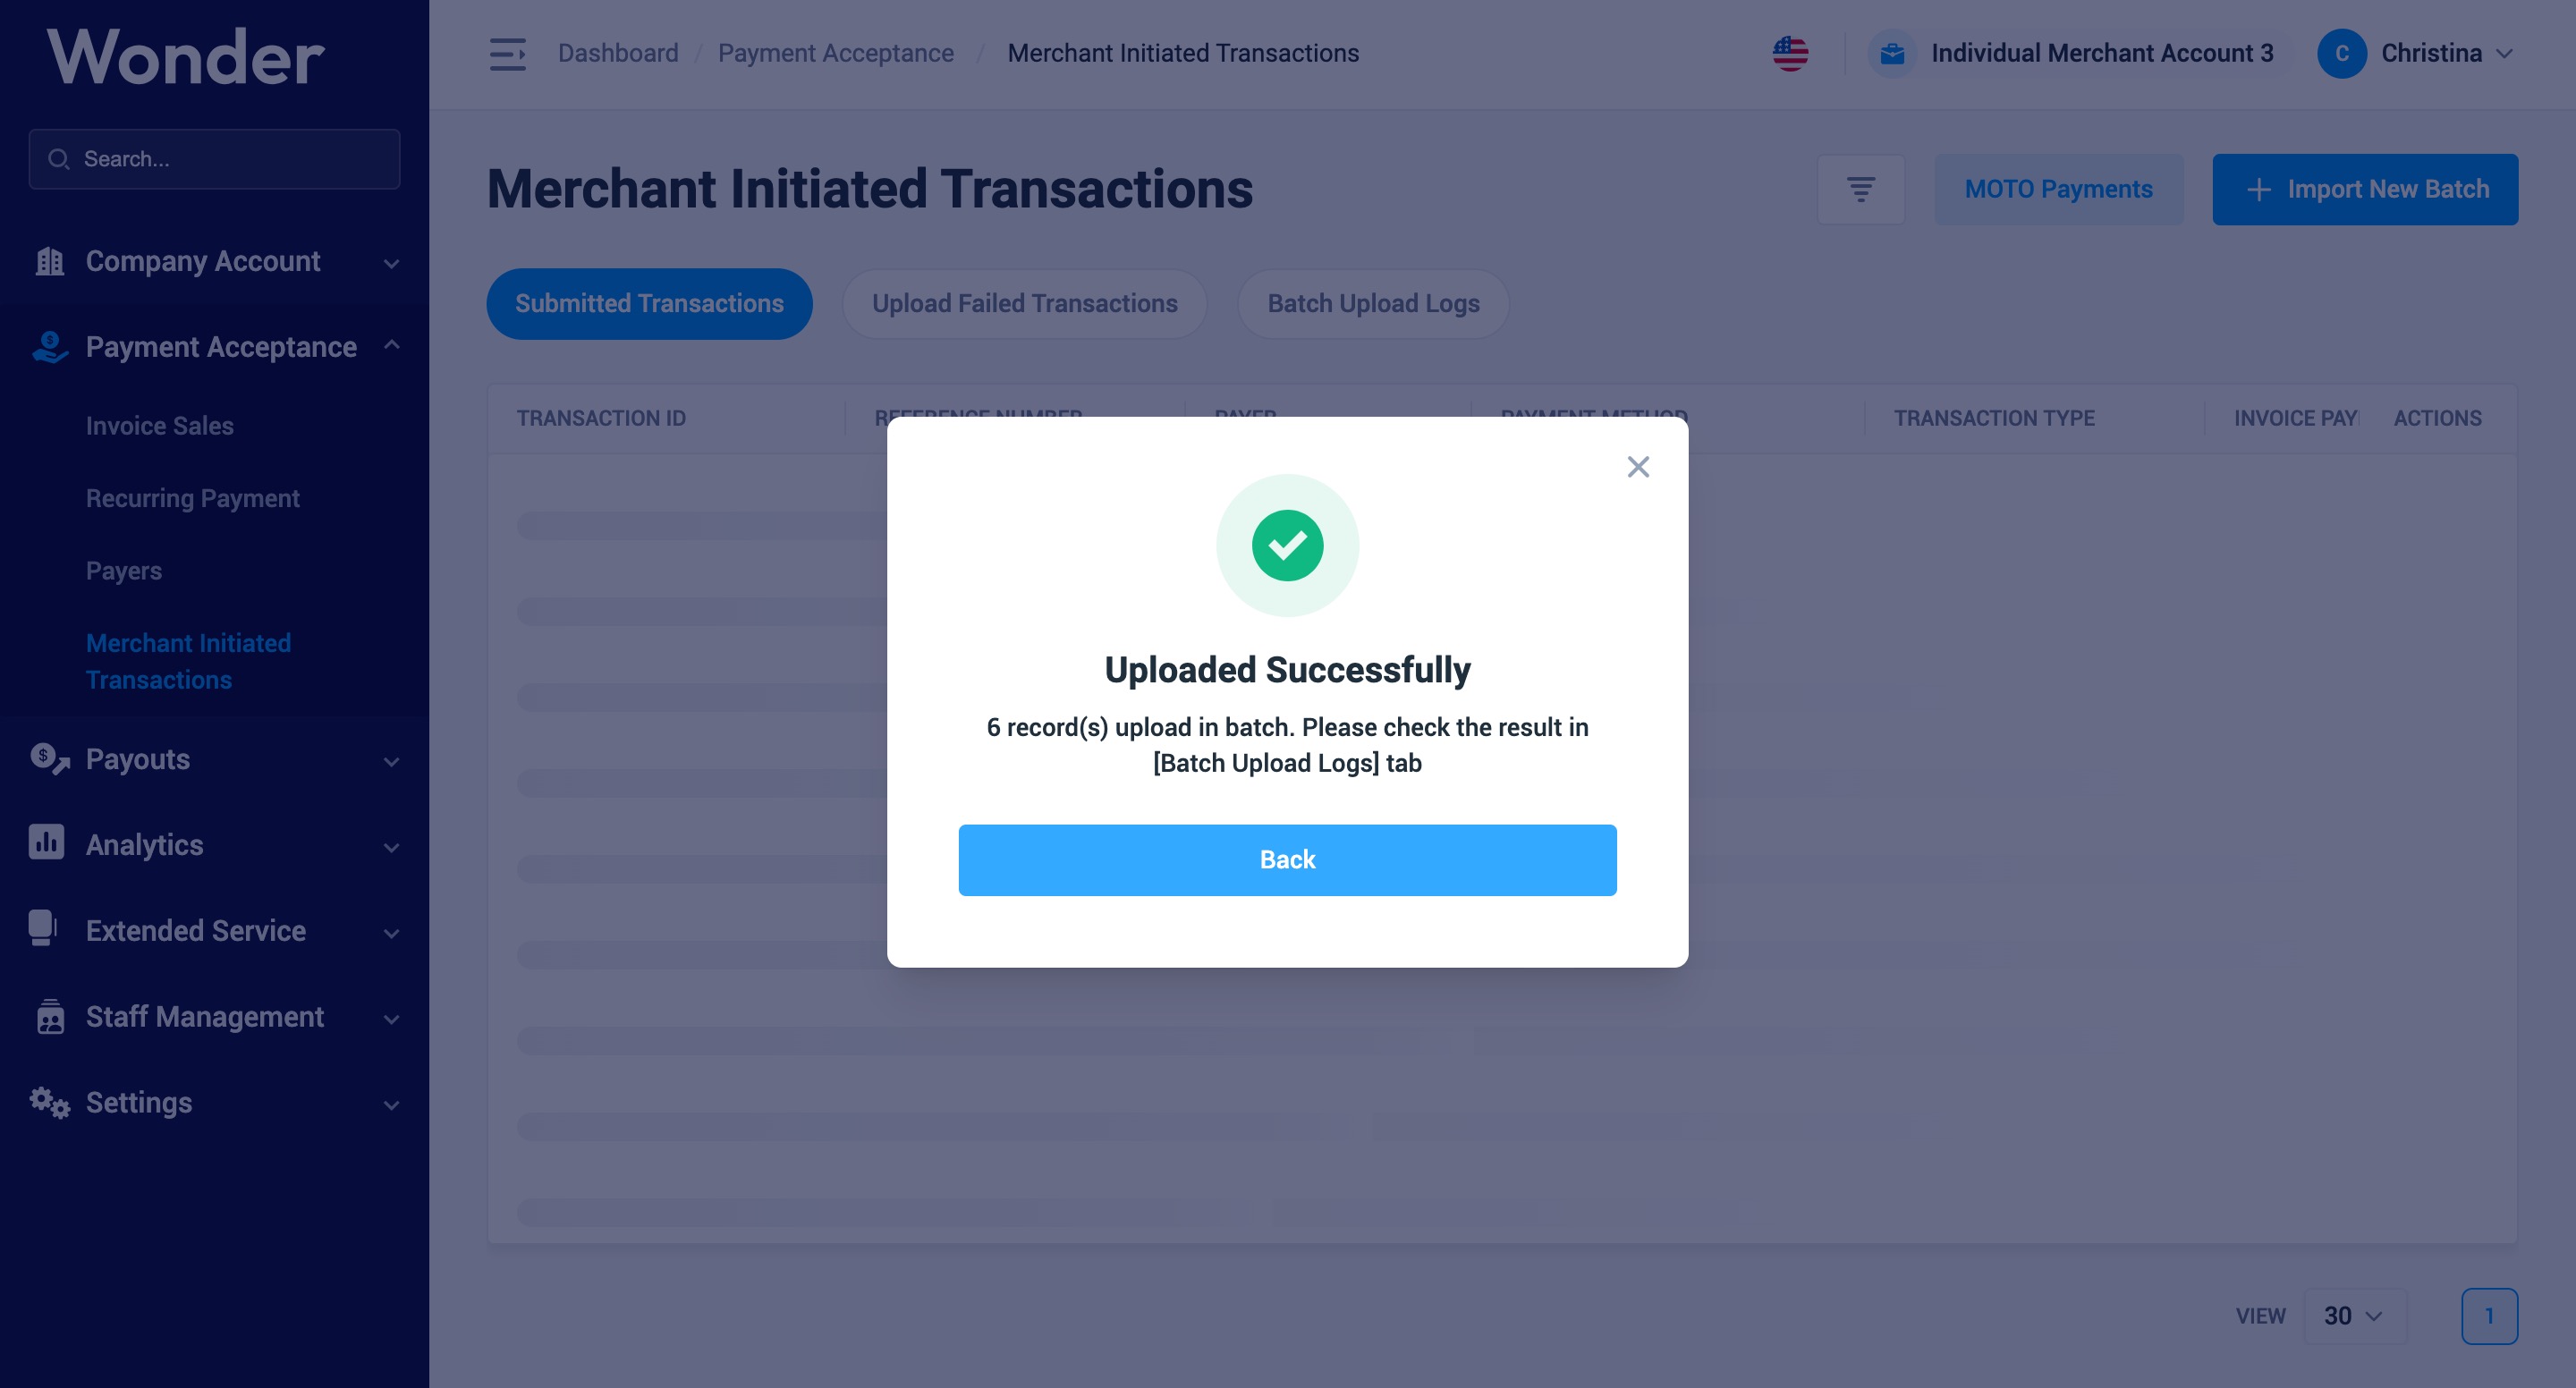
7- After the file is done uploading, you may select "Back" to exit the upload flow.
Before inputting data, it is critical to distinguish between the four core transaction types—each has unique purposes, mandatory fields, and constraints. The table below summarizes their key differences:

For each transaction type, follow the mandatory fields and constraints below to ensure successful processing.
Authorize Transaction
The "Authorize" action is used to create a new Sales order. It requires either tokenized card info or manual card details—never both.
Applicable Fields
Capture Transaction
The "Capture" action is used to capture a pre-authorized transaction. It only applies to pre-authorized transactions (not direct Sales).
Applicable Fields
Void Transaction
The "Void" action cancels a completed transaction and reverses the full amount. It is only allowed before the daily settlement (dayend)—after dayend, use "Refund" instead.
Applicable Fields
Refund Transaction
The "Refund" action returns funds to the customer for a transaction that has already been settled. It supports partial or full refunds.
Applicable Fields
1- Go to your Store in Wonder Dashboard and select "Merchant Initiated Transactions" under "Payment Acceptance"
2- You may view all processed transactions under "Submitted Transactions" and "Upload Failed Transactions".

3- You may also instead click "Batch Upload Logs" to view individual record of a transaction batch.
4- For any batch record that has a completed upload status, you may also "Export Result File".
1- Go to your merchant account in Wonder Dashboard and select "Merchant Initiated Transactions" under "Payment Acceptance" and click " MOTO Payment" button.
2- Input invoice amount and click " Next".

3 Choose an existing Payer (you can also skip this step).
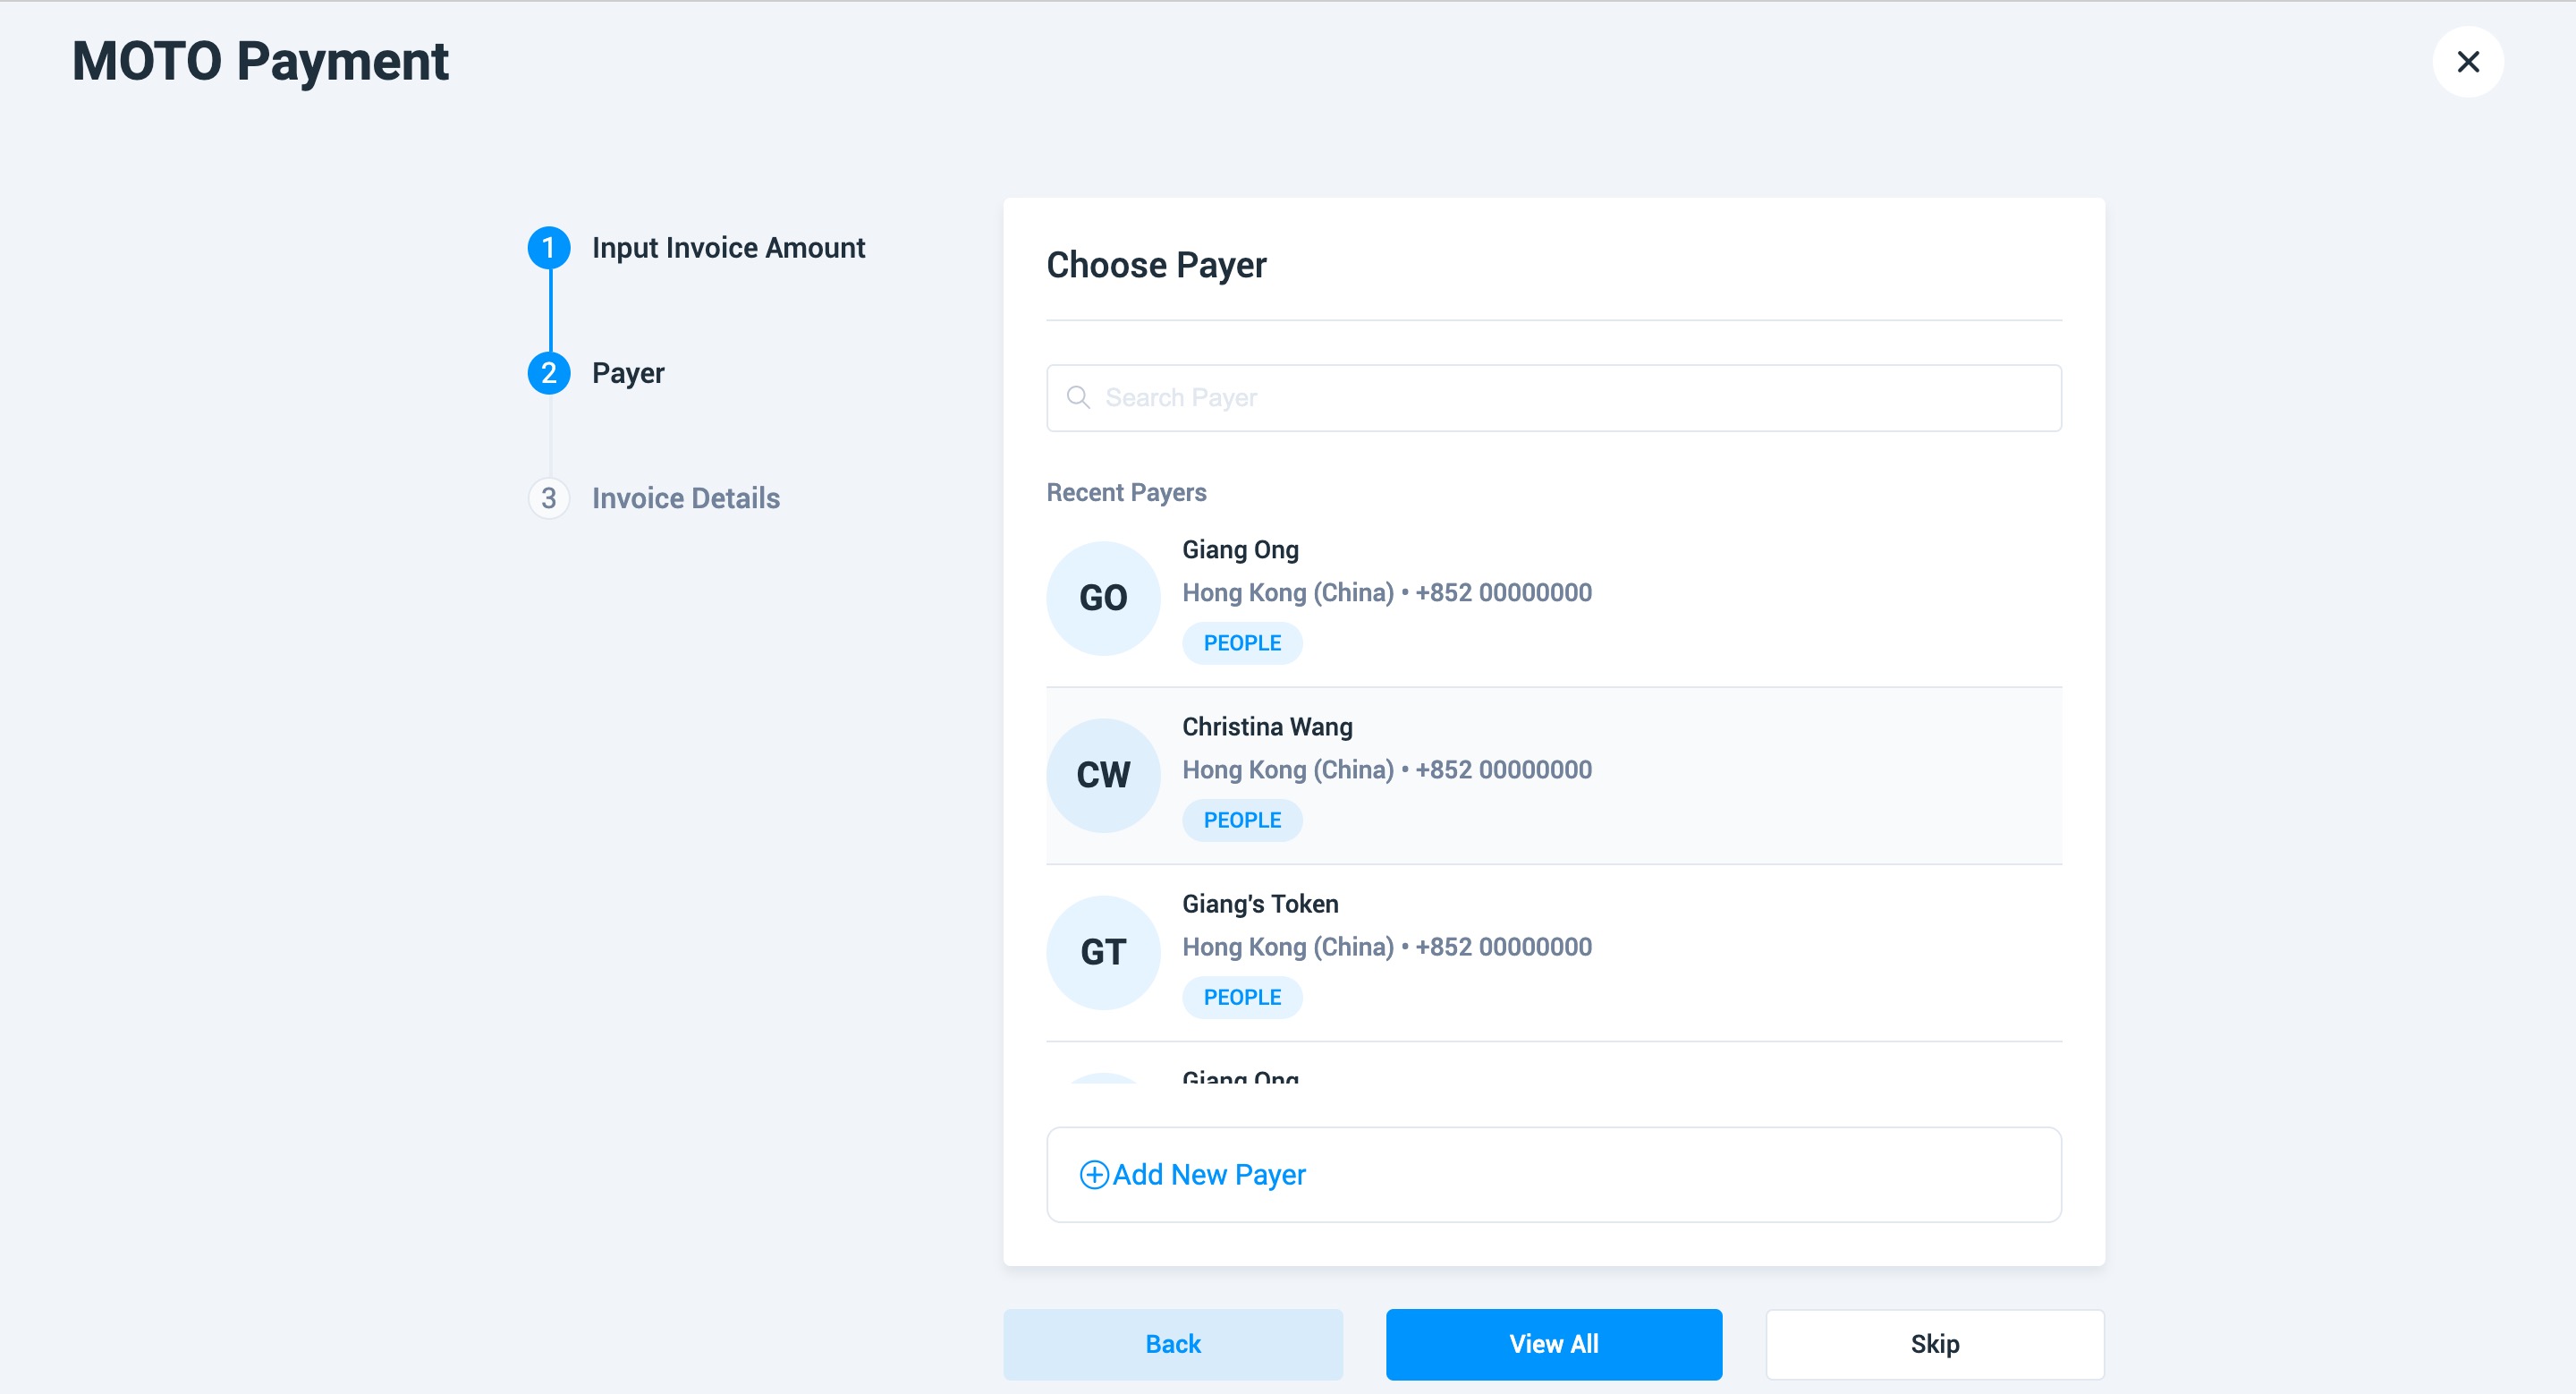
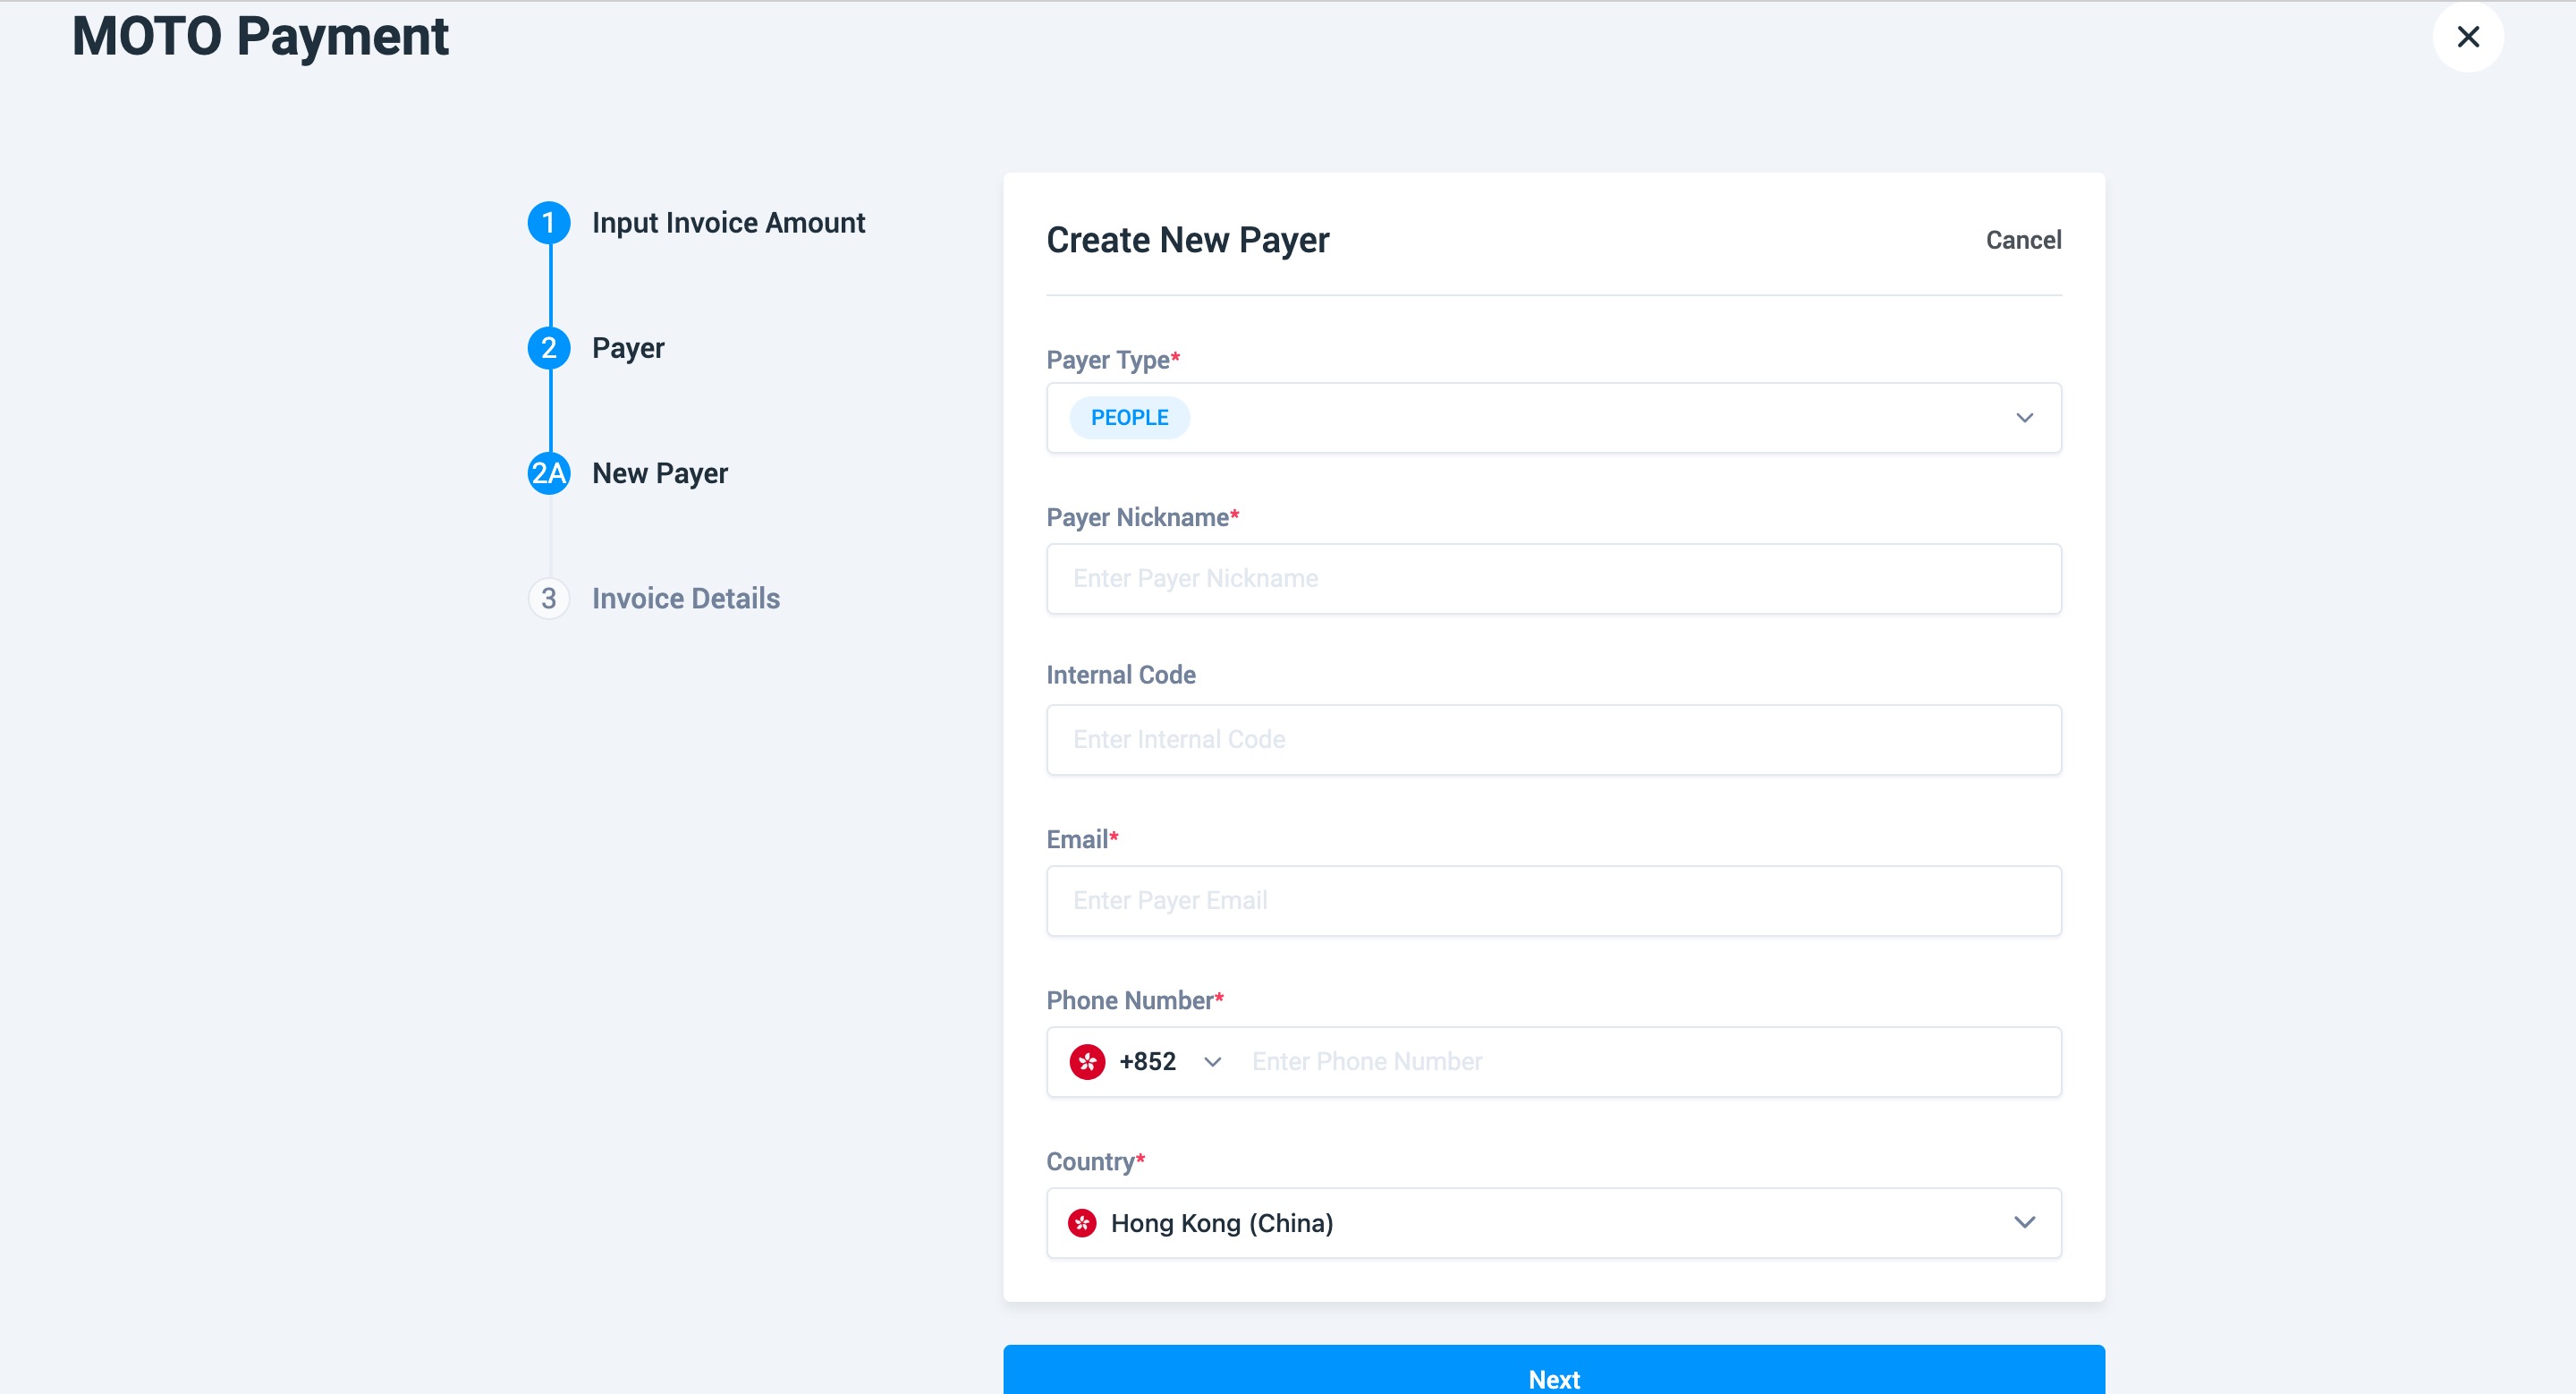
or click "Add New Payer".
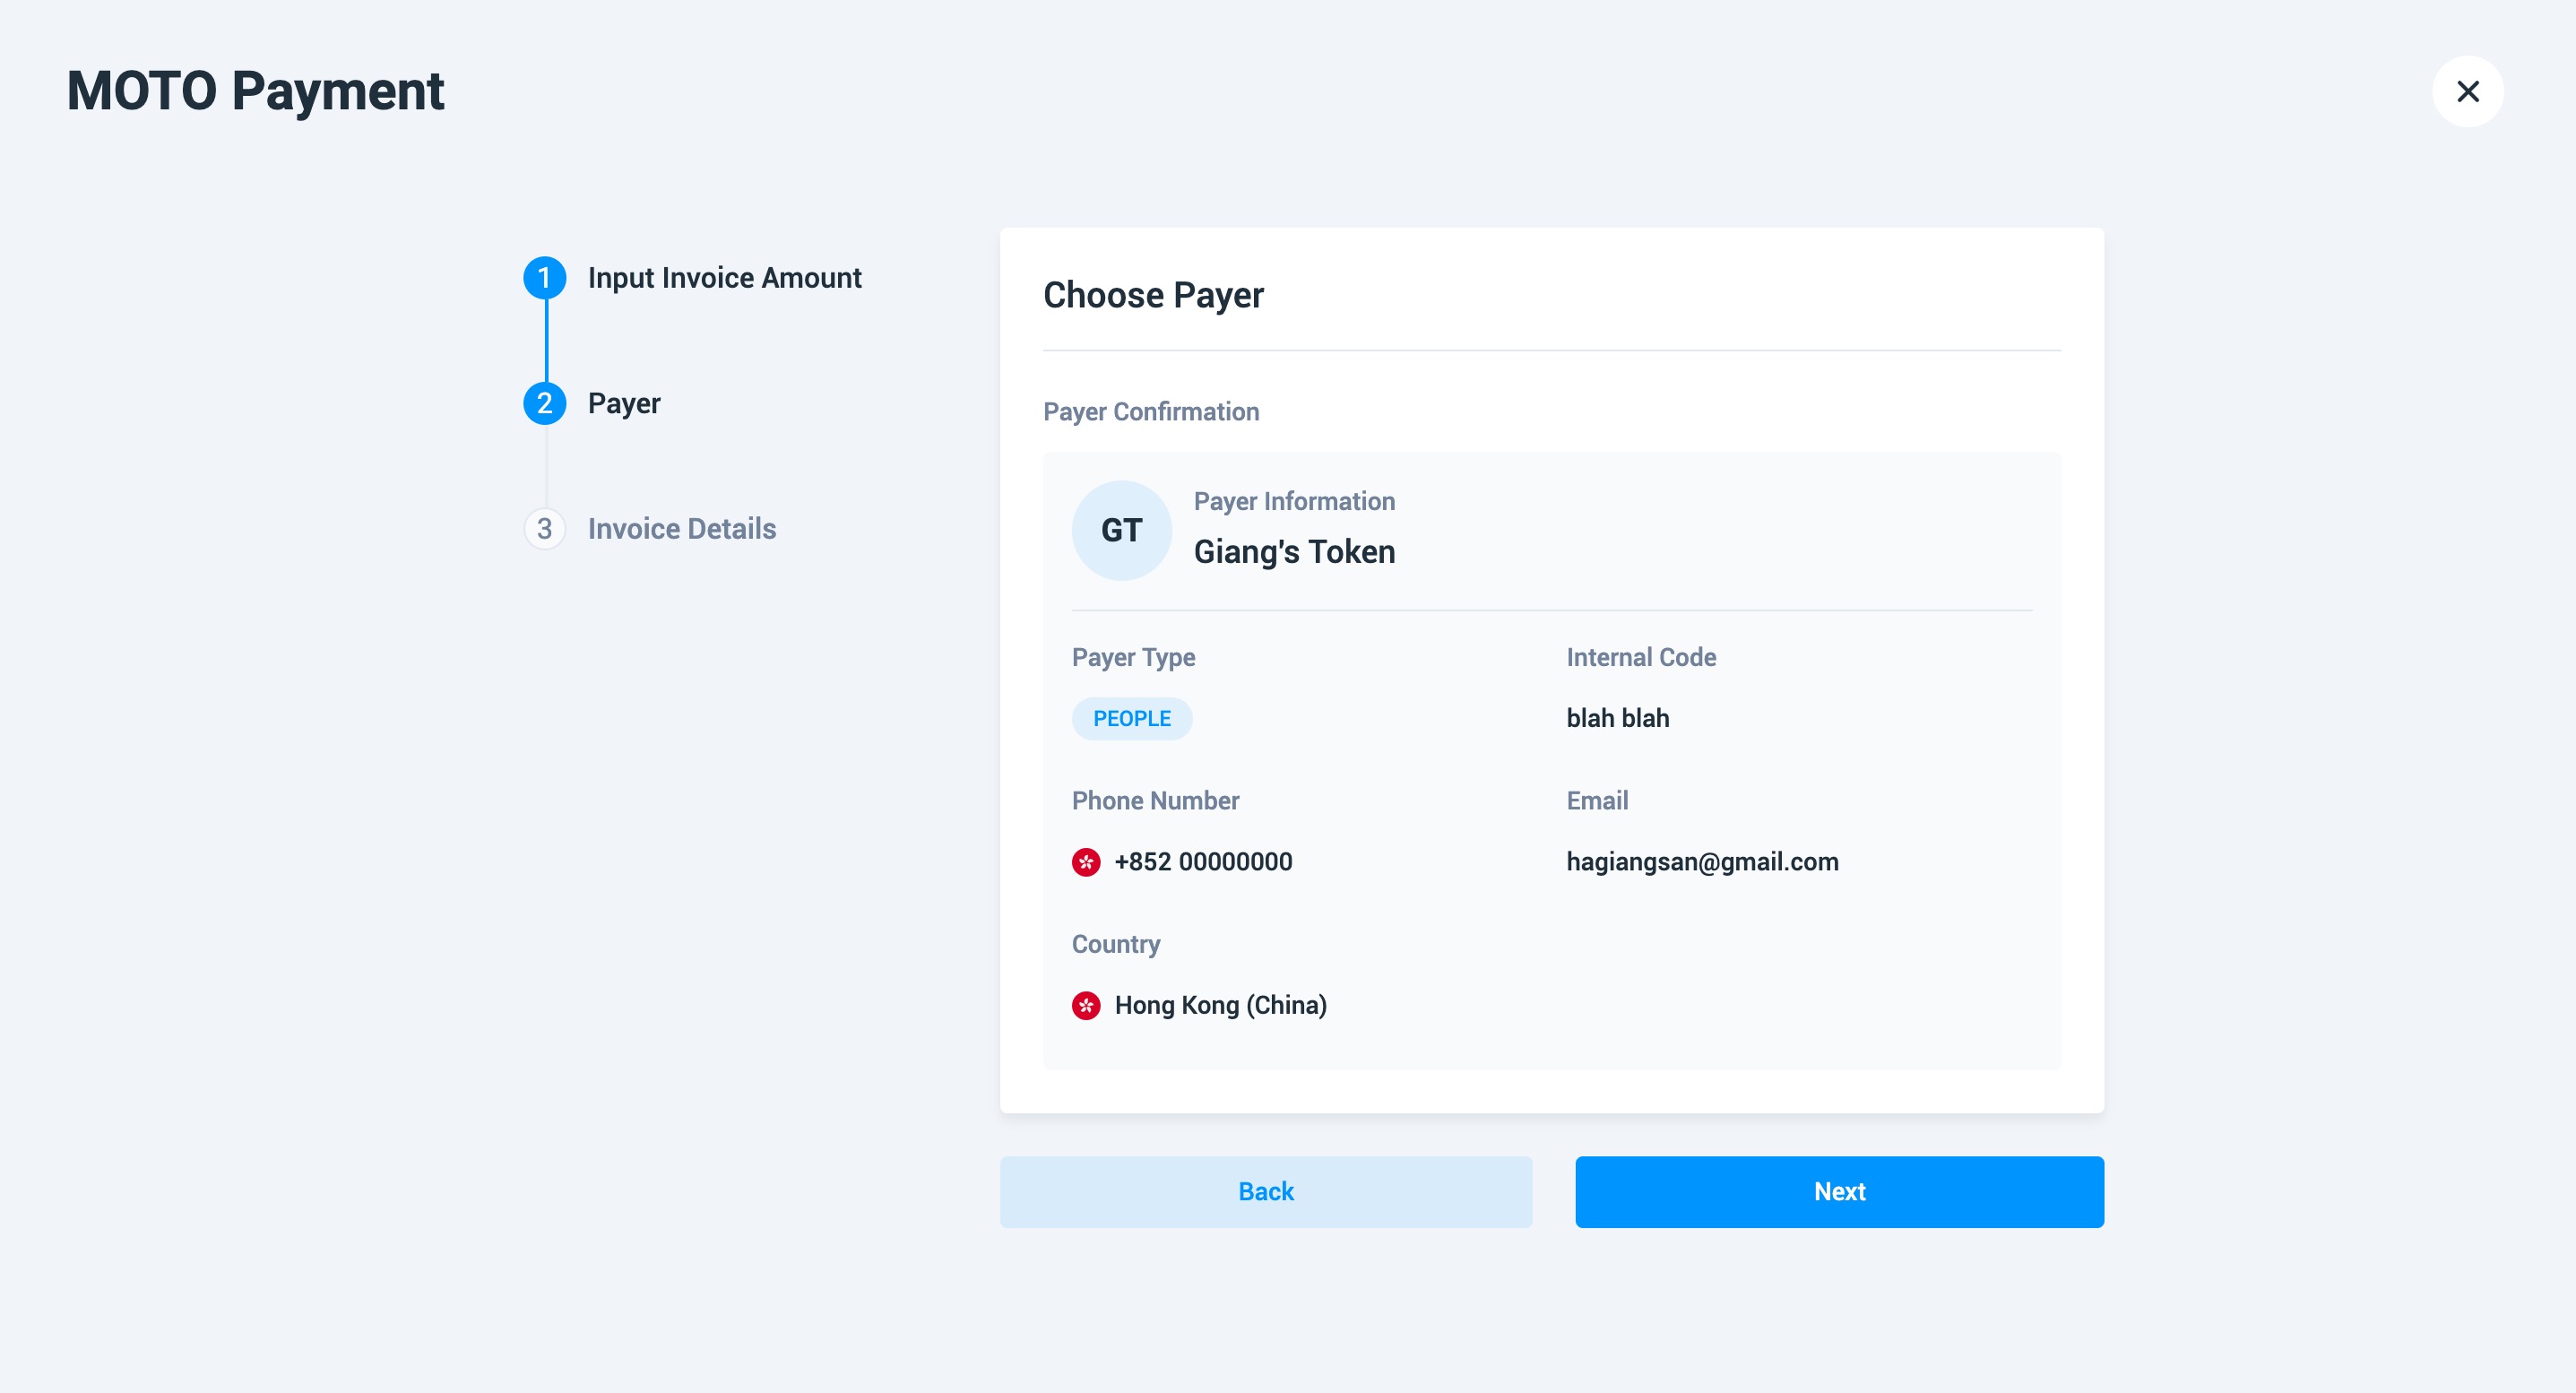
4- Go to Next and view Payer Information.
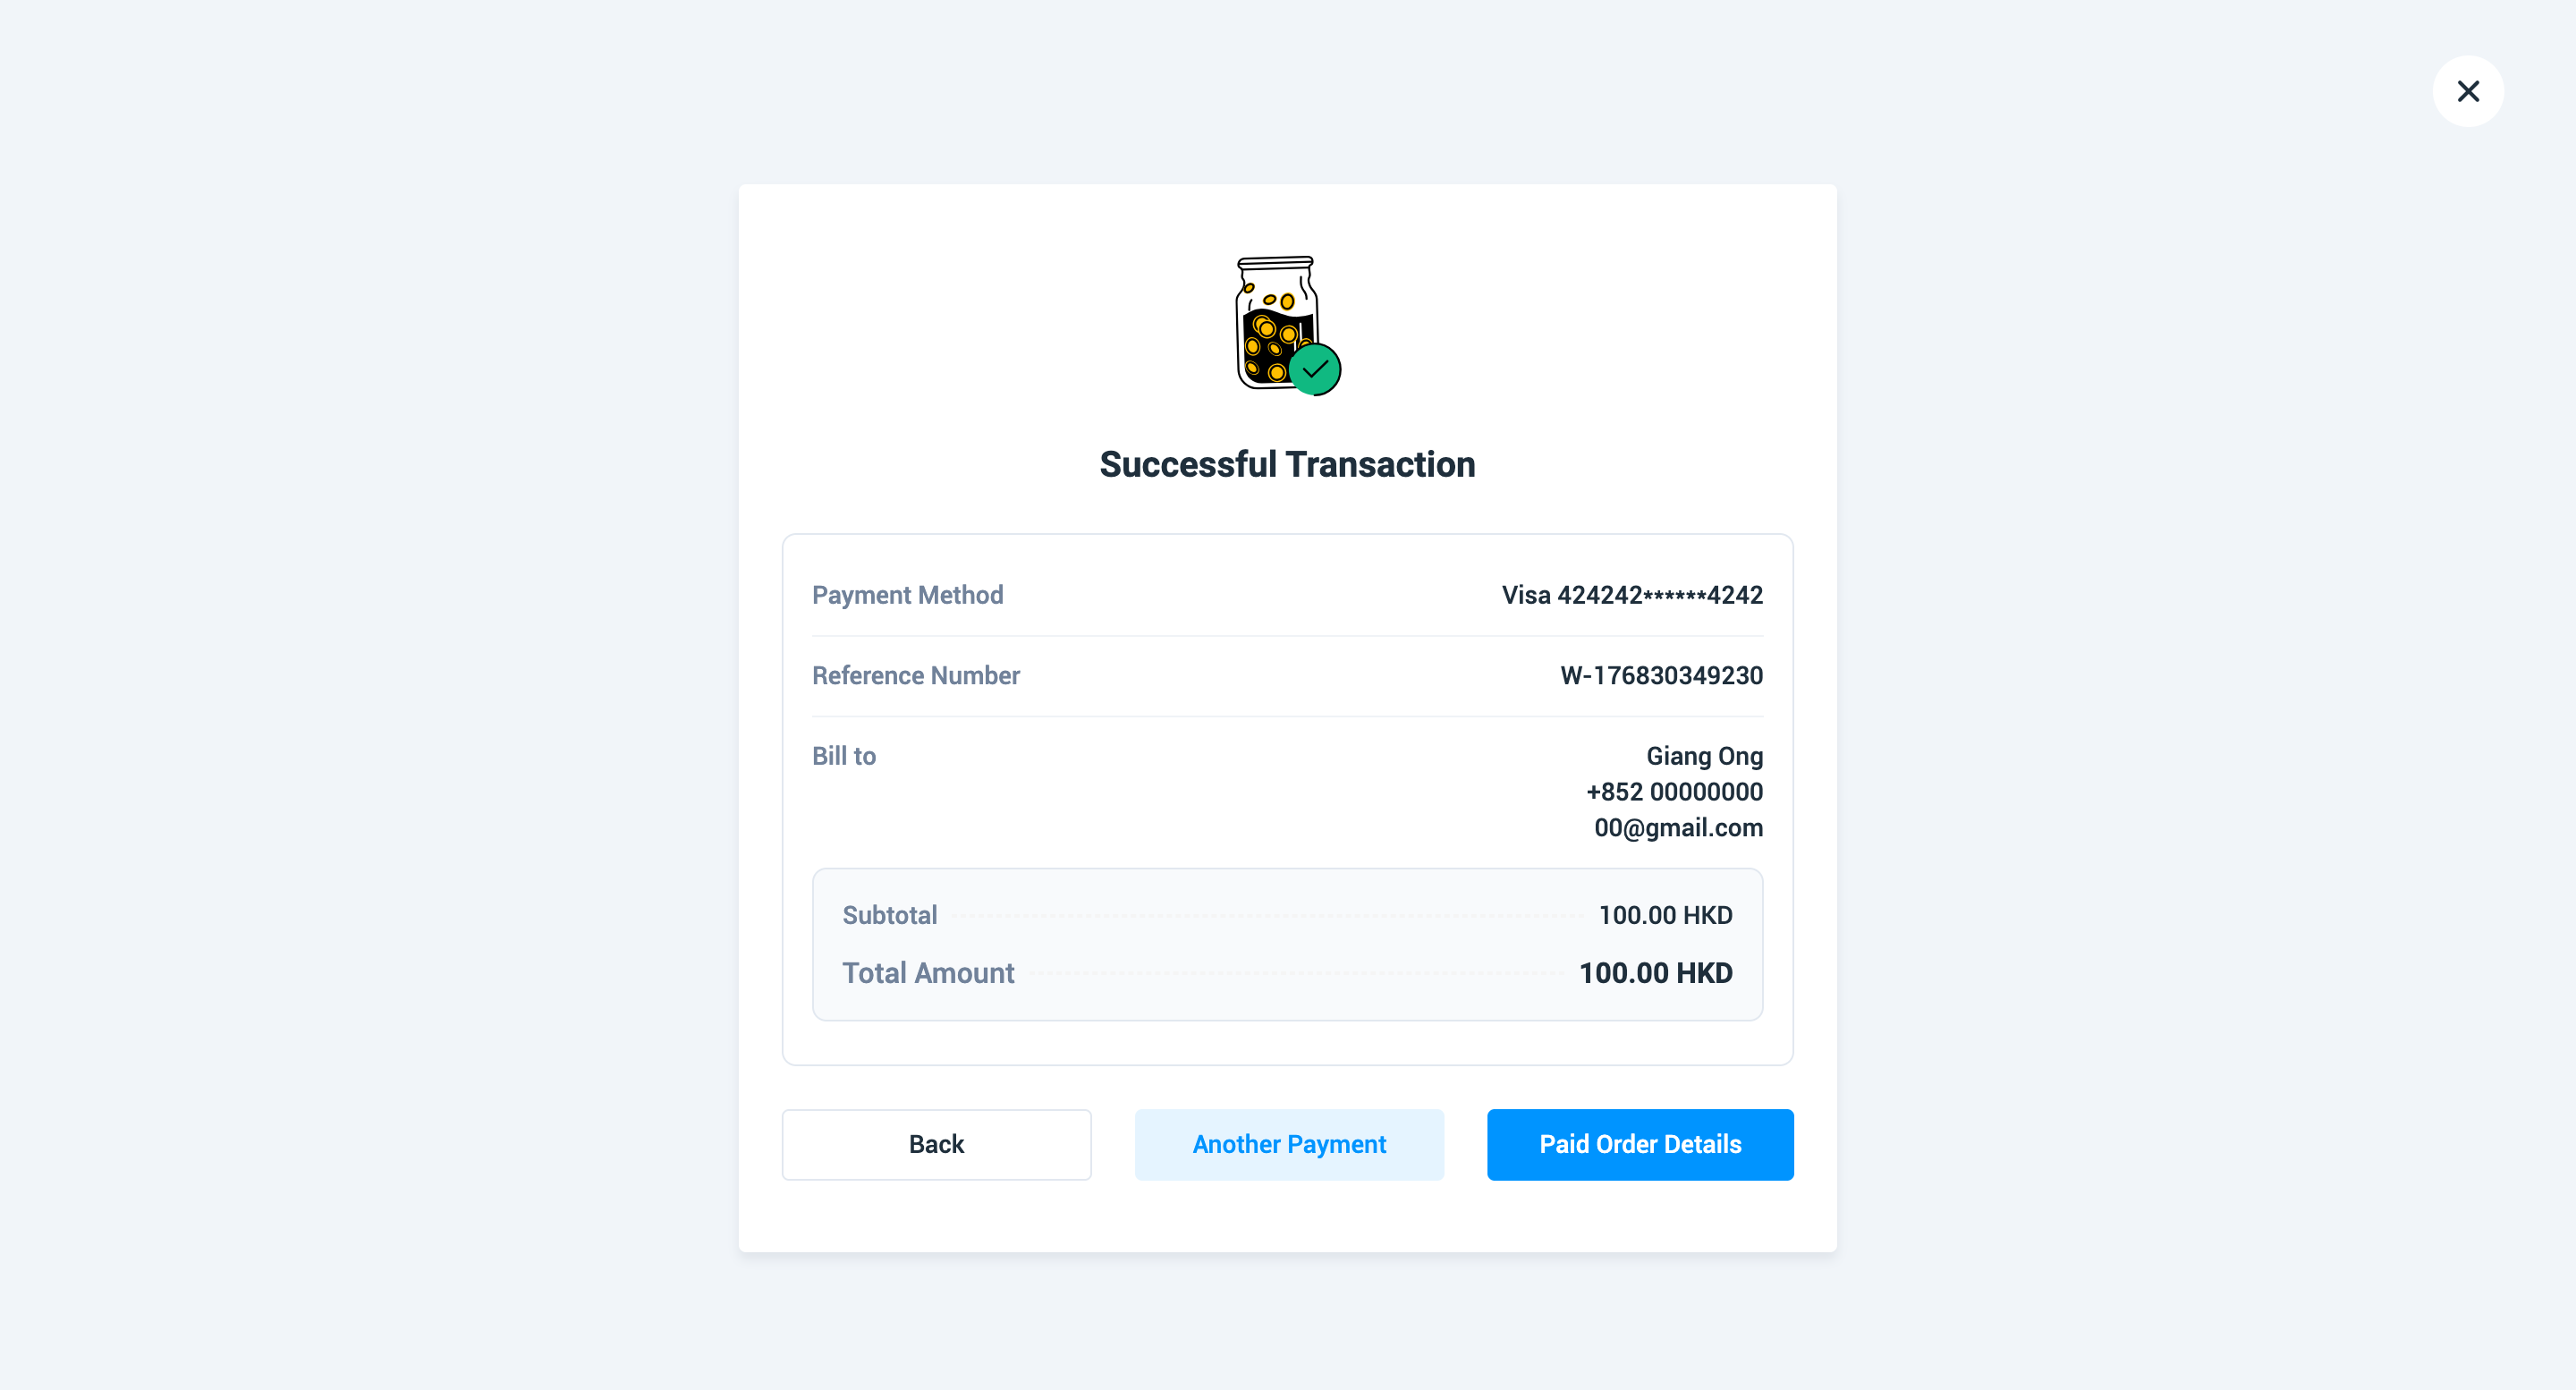
5- Input card information:Card Number, Expiry Date, Cardholder First Name, Cardholder Last Name, Cardholder Phone Number with CVC is optional and other information. If you would like to save the card for next payment, please tick " I would like to tokenize this card as default for further payments." Choose " Initiate Payment" to make a MOTO Payment and check the transaction status.

6- You can make another payment again by clicking "Another Payment", or go back and view details of completed transacition.
Once the transactions have been processed, you can refer to the details in Transaction Breakdown Reports in real-time. To Export Transactions Breakdown Reports, please refer to the the below. guide: https://help.wonder.app/articles/how-to-check-transaction-and-settlement-report-in-wonder-dashboard
Bindo Knowledge Base offers a comprehensive guide to POS System and more through step-by-step articles and video tutorials. Be sure to check out FAQs or search here
We provide email support Monday through Friday. We do our best to respond to each request with a personalized reply within 24-48 business hours.