
Coming soon

1- Go to your store in Wonder Dashboard and Select "Business Settings" under the "Settings"

2- You can Edit the Business Information here such as "Account Name", "Highlight", "Contact Information" and add "Store Photo"

3- Click "Save" to save the changes

4- In Advanced Settings, you can enable "Auto-disbursement", edit "Dayend Time", Select "Save" to save the changes

5- To edit the bank accounts got to "Related Company Account" under "Settings"

6- Here you can view existing "Related Company Accounts" or add a new one

7- You can add a new bank account and click "Save" to save it

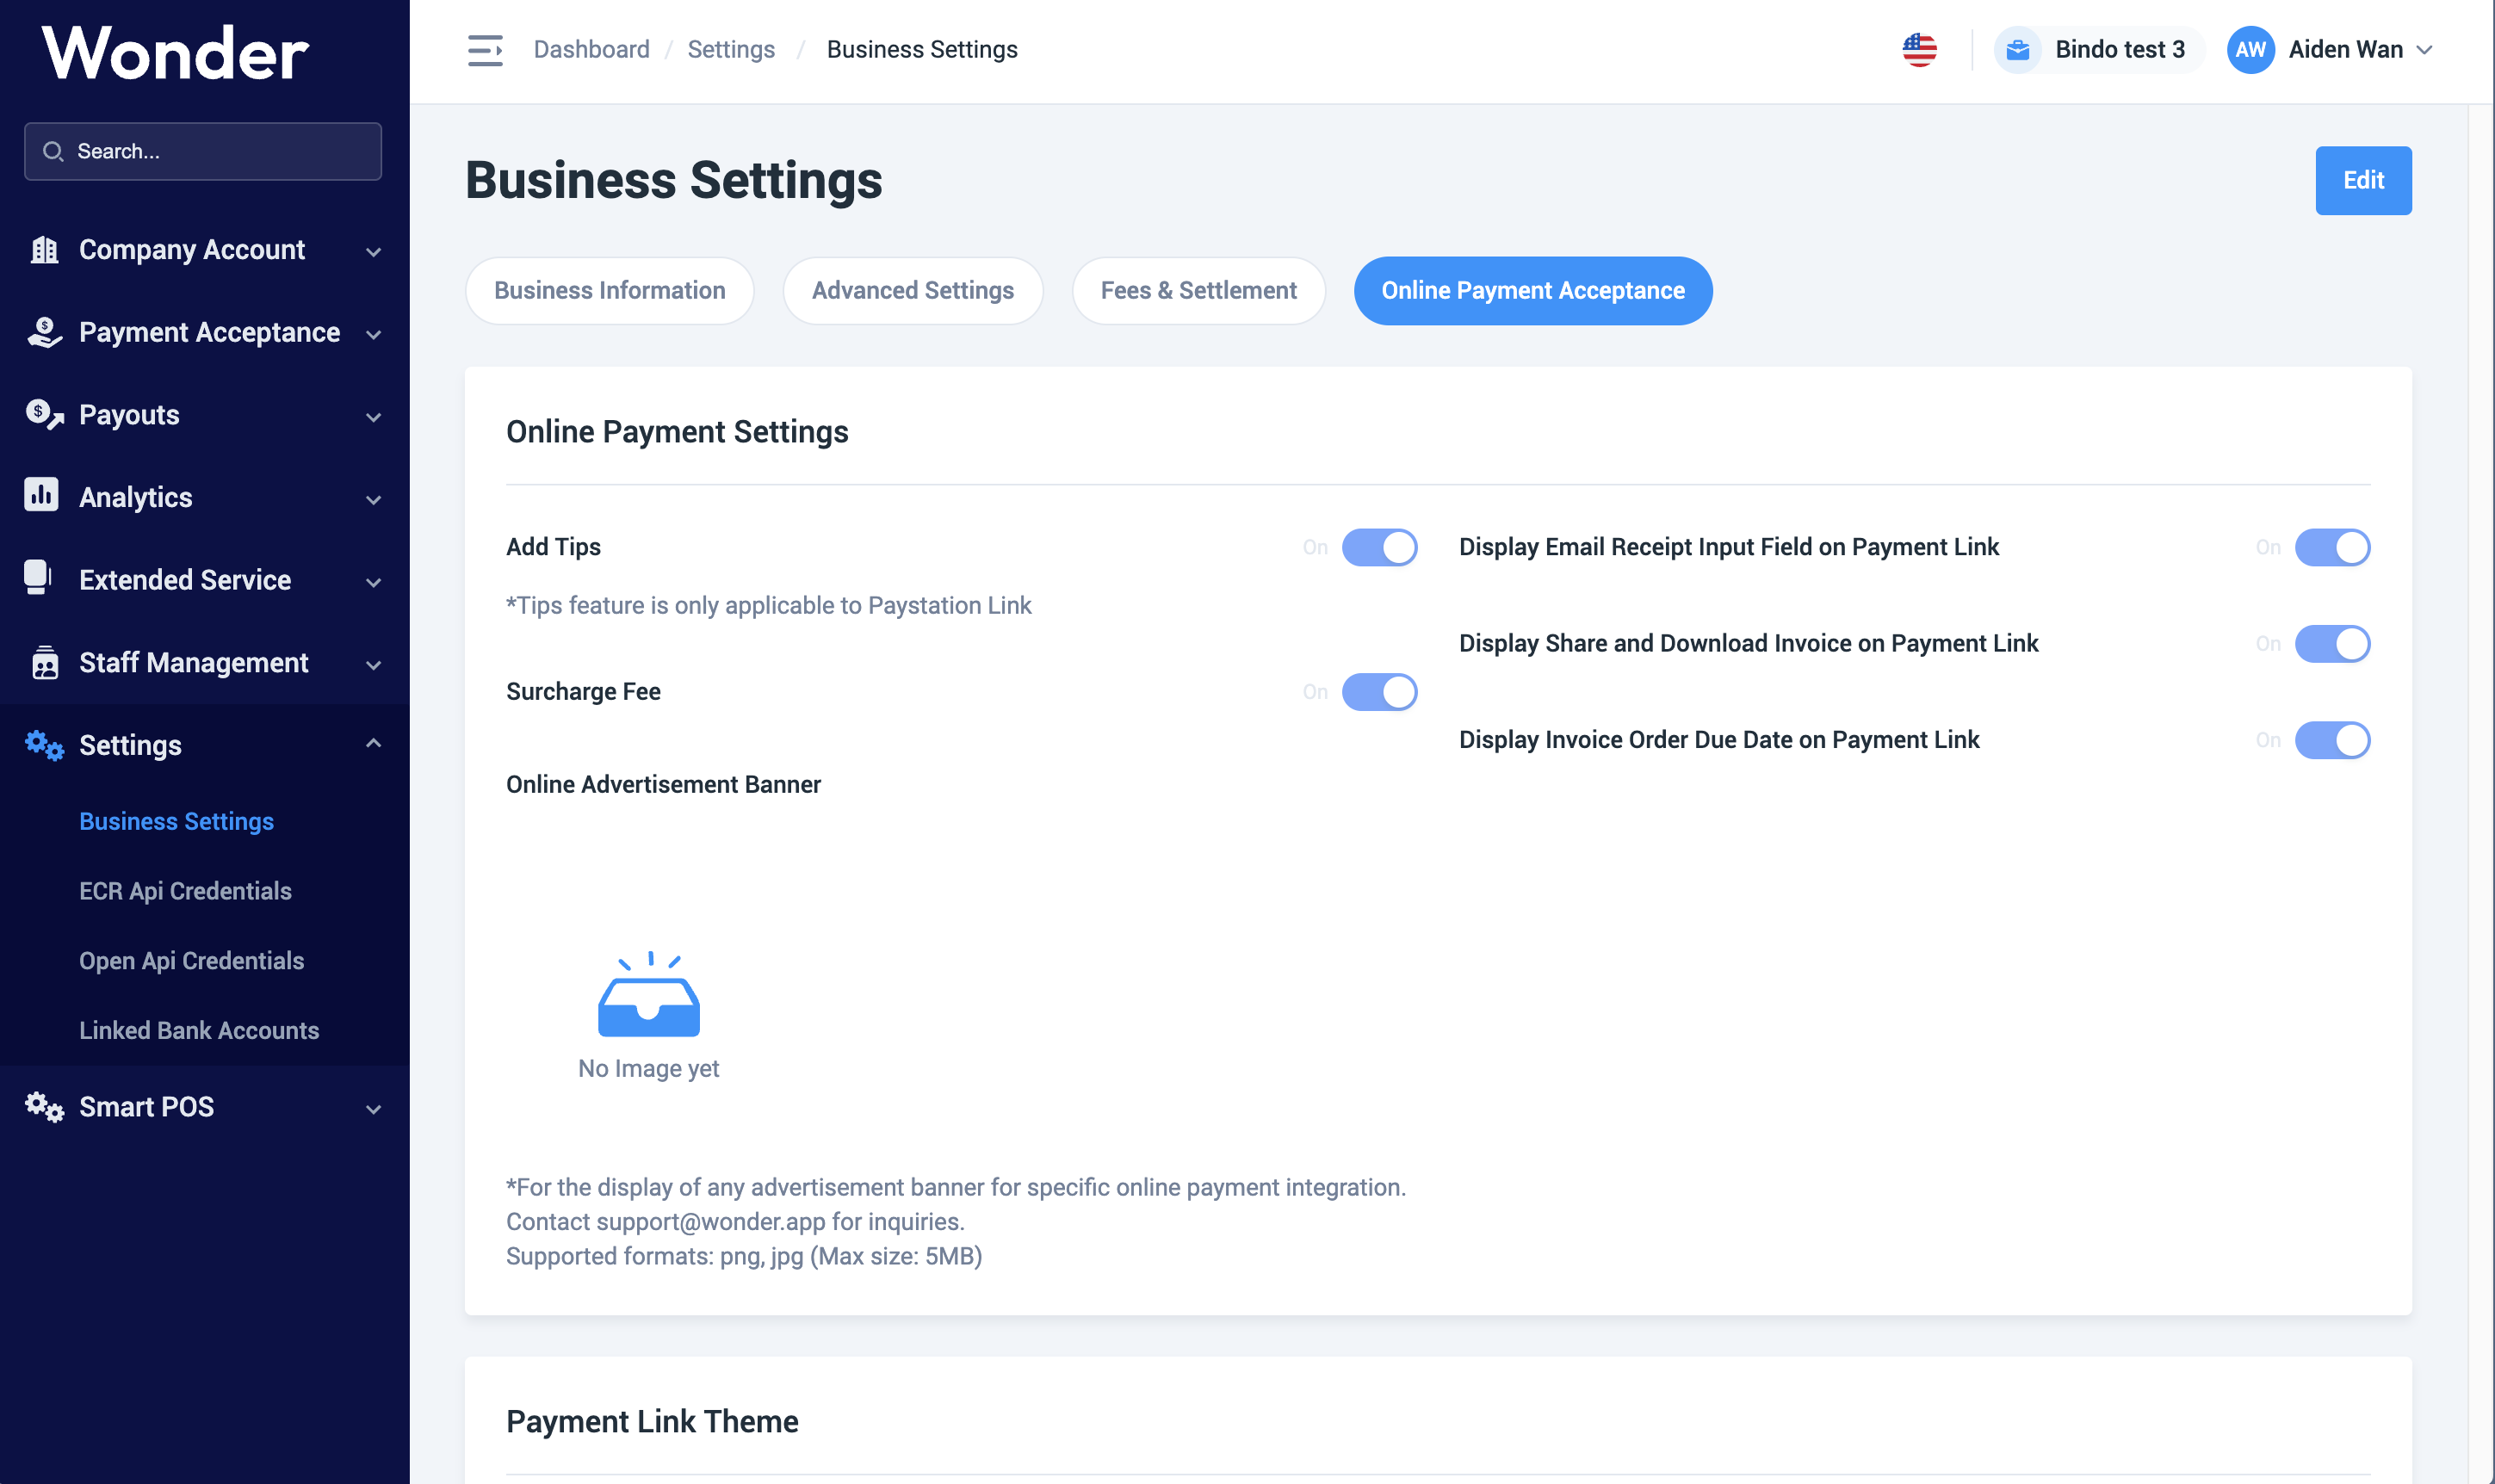
1- Under the tab "Online Payment Acceptance", you can customize the payment link by enabling settings like tips, surcharges, and banners. You also have control over interface visibility—such as the email receipt field, invoice sharing buttons, due date display & can customize and preview the appearance of your payment links to match your brand.
2- To reset to default theming, You can click "Edit" -> "Reset to default theme" -> "Save". And you can preview the desktop view of the overall Payment Link interface, before making edits or once saved.
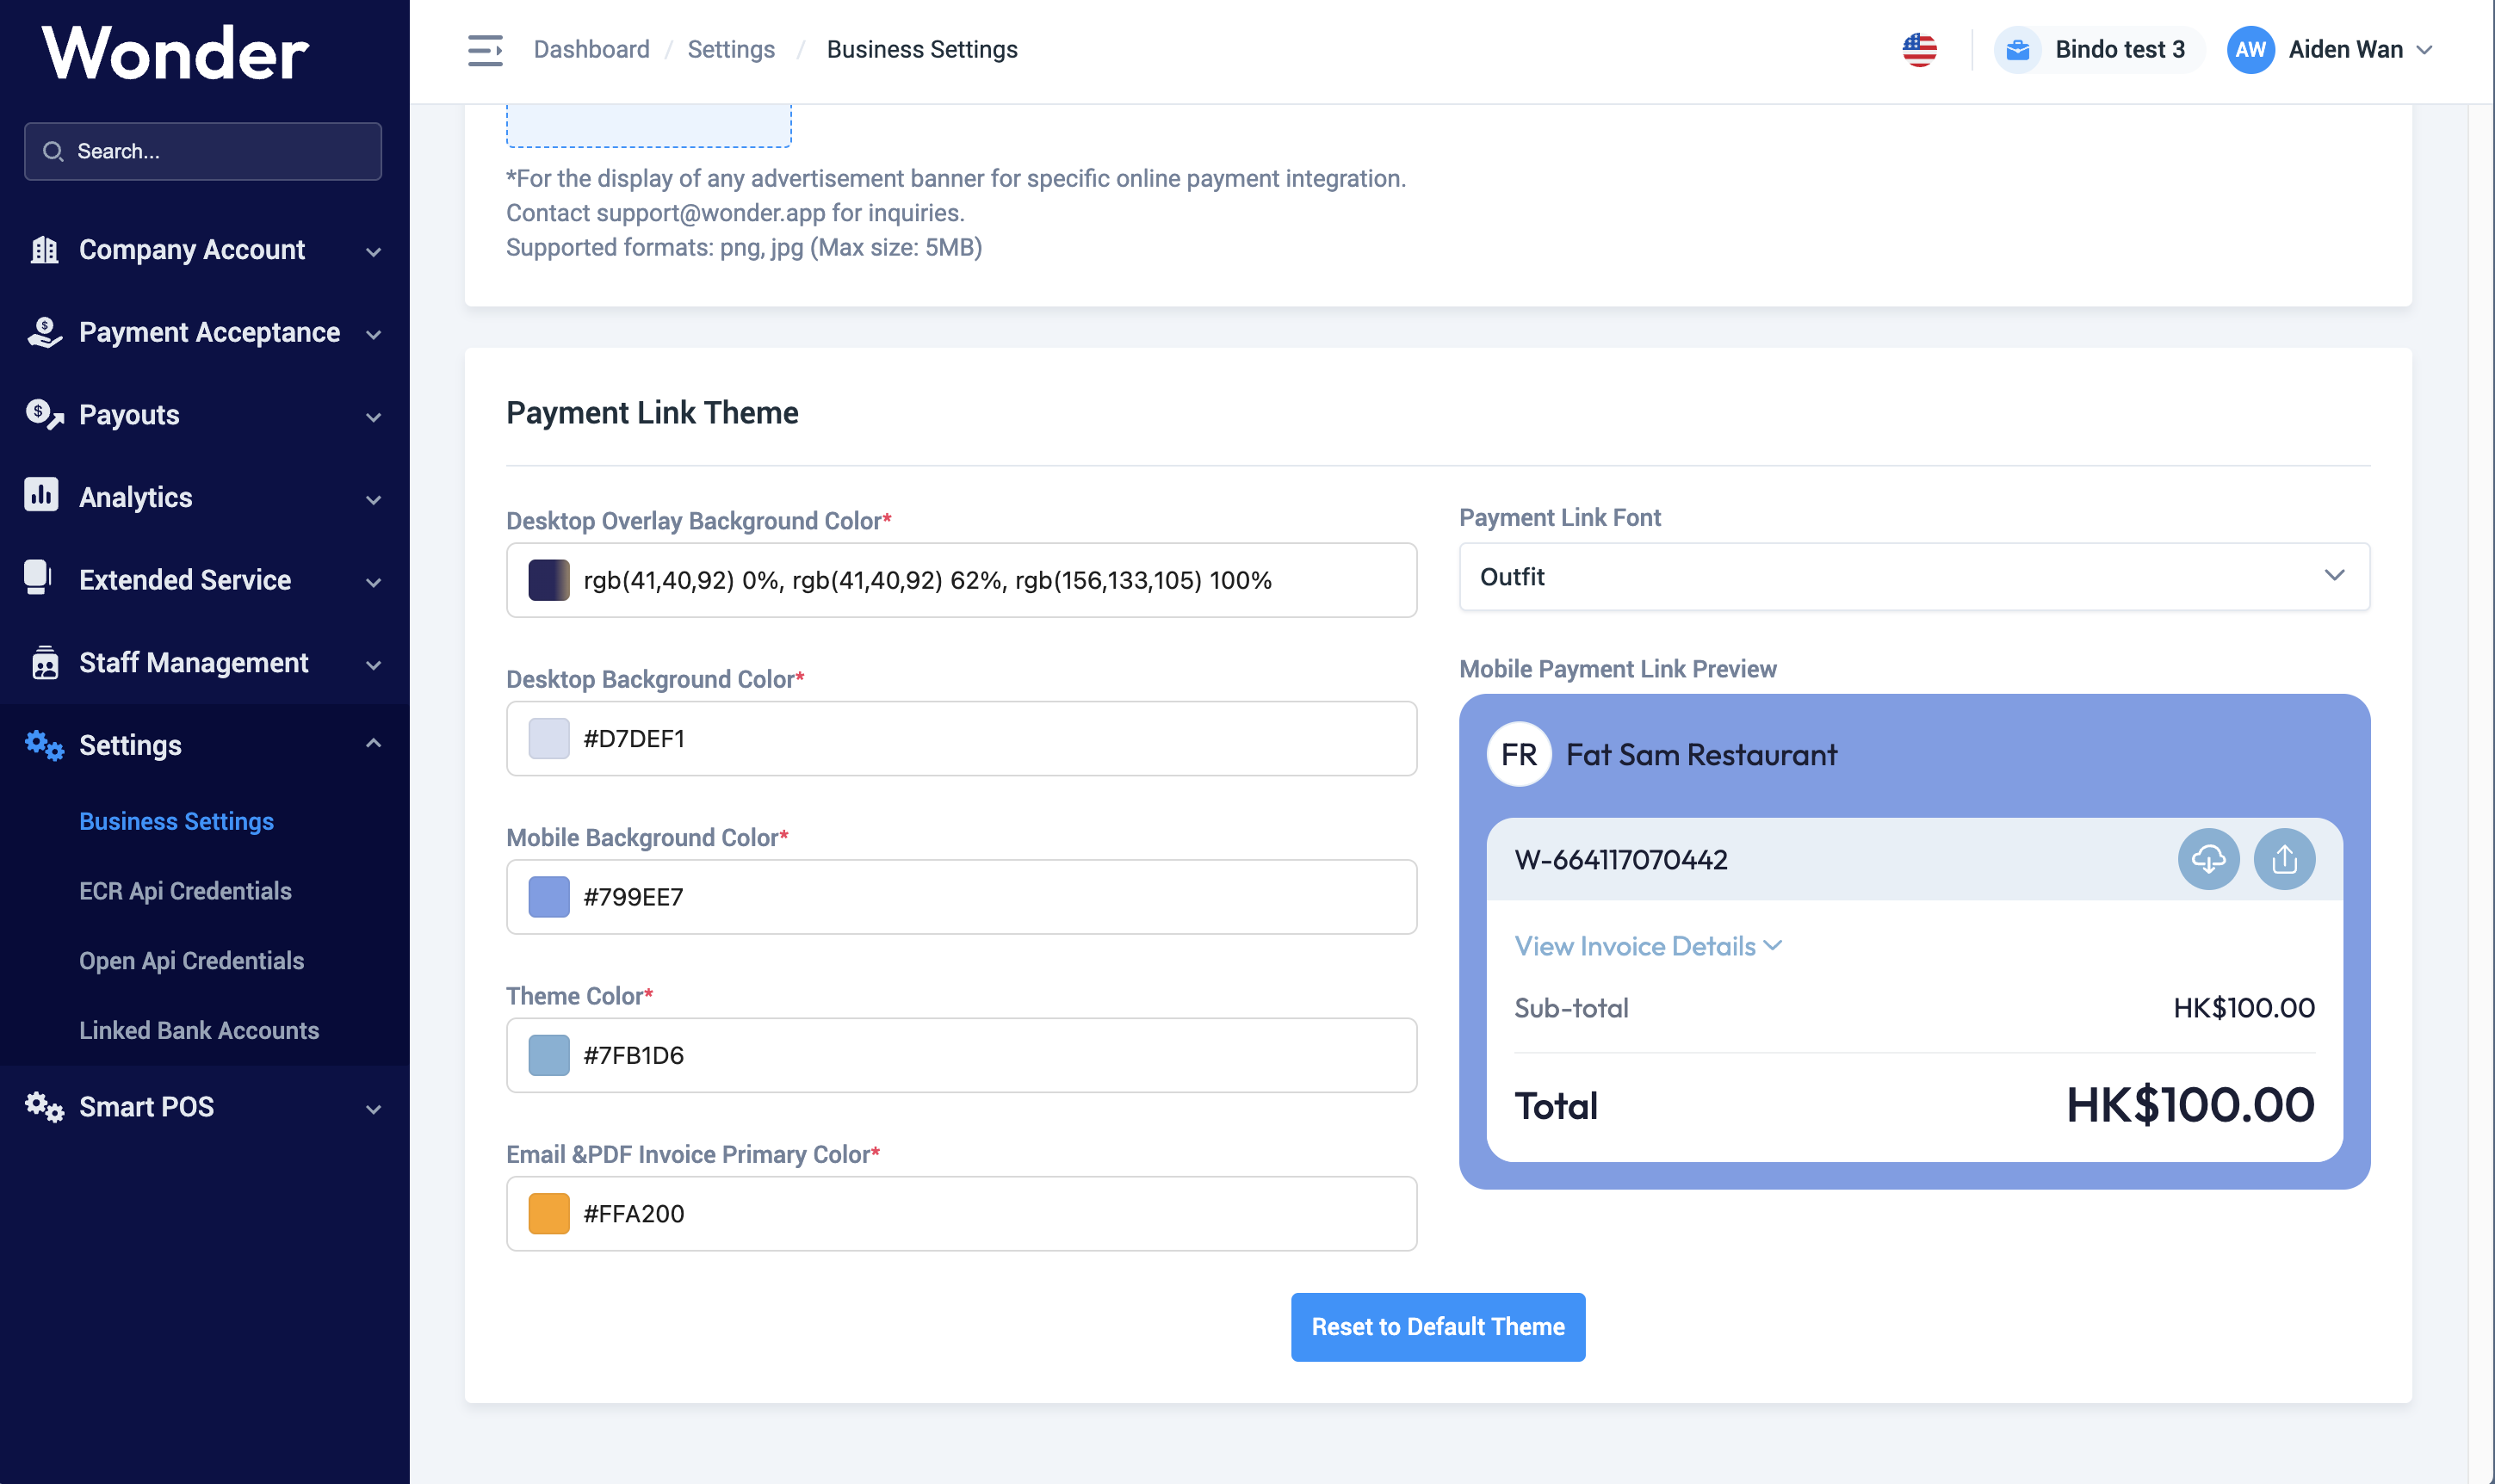
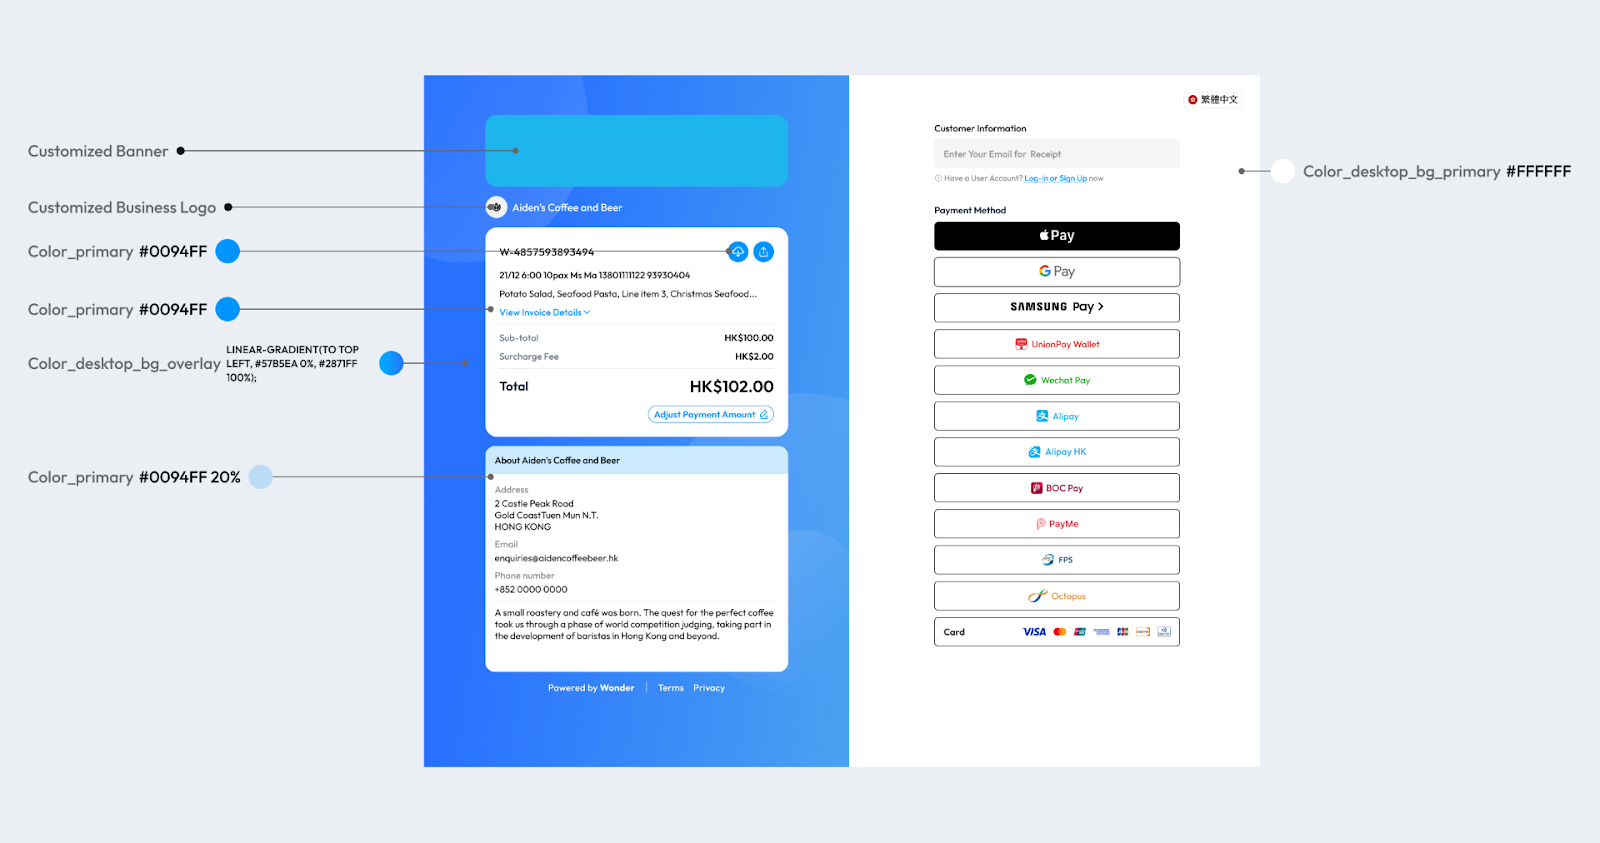
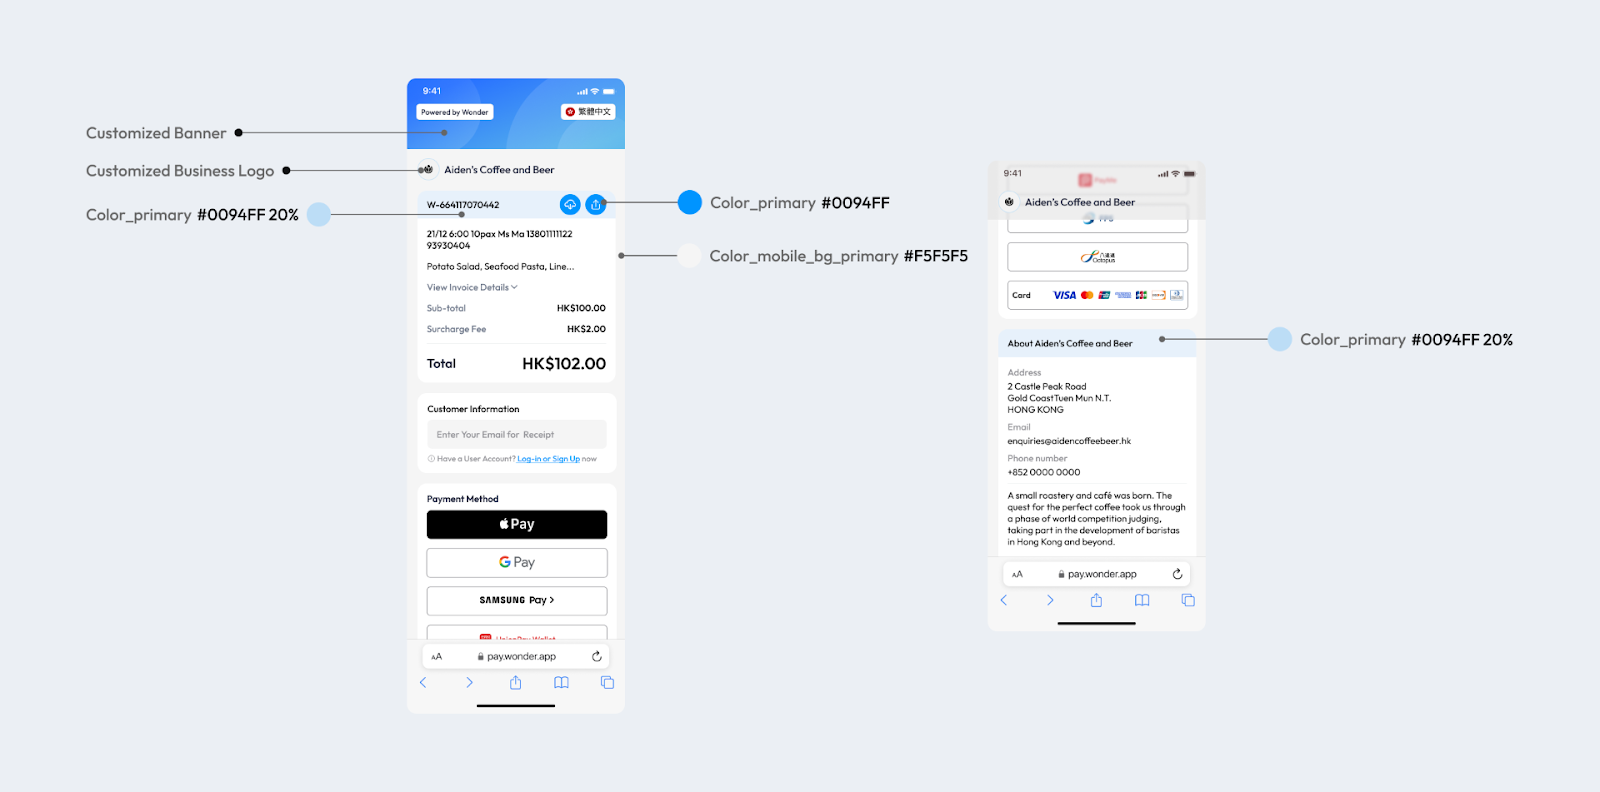
3- You will be able to manage the following components of your payment link's appearance:
Bindo Knowledge Base offers a comprehensive guide to POS System and more through step-by-step articles and video tutorials. Be sure to check out FAQs or search here
We provide email support Monday through Friday. We do our best to respond to each request with a personalized reply within 24-48 business hours.